Ruckus vSZ (formerly vSCG)
The configuration process of vSZ (Virtual Smart Zone) is similar to configuration of Ruckus ZoneDirector
Tested versions:
| Model | Type | Firmware version | Description | Limitations |
|---|---|---|---|---|
| vSCG | AP + controller | RuckOS 3.0.4 | virtual controller | no speed control |
1. RADIUS (AAA) servers setting
Go to Configuration > AP Zones to set the authentication service of RADIUS servers and click the corresponding AP Zones name. Then select AAA and set the authentication access (auth) and accounting service (acct). Use the following parameter table:
| authentication service | accounting service | |
|---|---|---|
| Name | SOCIFI-auth | SOCIFI-acct |
| Type | RADIUS | RADIUS Accounting |
| Backup RADIUS | checked Enable backup RADIUS support | |
| Primary Server | ||
| IP address | <IP_primary_radius_server_by_geozone> | |
| Port | 1812 | 1813 |
| Shared Secret | socifi | |
| Confirm Secret | socifi | |
| Backup Server | ||
| IP address | <IP_secondary_radius_server_by_geozone> | |
| Port | 1812 | 1813 |
| Shared Secret | socifi | |
| Confirm Secret | socifi | |
We recommend to use this set of RADIUS servers:
RADIUS Access:

RADIUS Accounting:

2. Hotspot setting
In your AP Zone select Hotspot (WISPr) and create a new Hotspot Portal using this table:
| General | |
|---|---|
| Name | SOCIFI-hotspot |
| Redirection | |
| Smart client Support | Enable |
| Logon URL | External |
| Redirect unauthenticated user to the URL for authentication | http://connect.socifi.com/ |
| Start Page (after user is authenticated) | Redirect to the URL that user intends to visit |
| User Section | |
| Session Timeout | any value - it is dynamically change per user from SOCIFI Captive portal |
| Grace perriod | it is not used by SOCIFI |
| Location information | |
| Location ID | it is not used by SOCIFI |
| Location Name | it is not used by SOCIFI |
| Walled Garden | filled by Walled Garden list (listed bellow) |
Enter following Walled garden ranges:
If you are a customer with the White Label solution, please add your custom domain (for example *.mycustomdomain.com) to the Walled Garden list.
*.socifi.com
*.facebook.com
*.akamaihd.net
*.akamai.net
*.edgecastcdn.net
twitter.com
*.twitter.com
*.twimg.com
*.fastly.net
*.li-cdn.net
*.cloudfront.net
facebook.com
*.fbcdn.net
*.instagram.com
*.cdninstagram.com
instagram.com
*.linkedin.com
*.licdn.com
linkedin.com
facebook.com and twitter.com (Yes, twice. Once with and once without the asterisk)
Pages related to Walled Garden issues


3. WLAN setting
In your AP Zone select WLAN and create a new WLAN Configuration profile using following parameters:
| General Options | |
|---|---|
| Name | e.g. SOCIFI_TEST |
| SSID | e.g. SOCIFI@FREE |
| WLAN Usage | |
| Authentication Type | Hotspot (WISPr) |
| Authentication Options | |
| Method | Open |
| Encryption Options | None |
| Authentication & Accounting Service | |
| Authentication Service | SOCIFI-auth |
| Accounting Service | SOCIFI-acct |
| Send Interim update every | 10 minutes |
| Hotspot Portal | |
| Hotspot (WISPr) Portal | SOCIFI-hotspot |
| Bypass CNA | not checked |
| Options | |
| Acct Delay Time | not checked |
| Wireless Client Isolation | enable |
| Priority | High |
| RADIUS Options | |
| NAS ID | AP MAC |
| Called STA ID | AP MAC |


Under WLAN Group create a new WLAN group if not existing already and select the WLAN profile you've just created. Assign the WLAN profile to APs
4. Set Northbound Portal Intervace (NBI) password
See the setting the Password example used in SmartCell Gateway 200

If Northbound Portal Interface (NBI) is used (API Access) is used
Make sure your Firewall Settings are set correctly.
If you have a Firewall, it may or may not block the communication / connection to SOCIFI Servers (Captive Portal, API endpoints, RADIUS servers).
The following IP Addresses have to be passed thru the Firewall or any other blocking mechanism to successfully reach SOCIFI. Without allowing these IP Addresses to go thru your Firewall, your deployment cannot work properly.
API Access is used by Ruckus, Ubiquiti and ANTlabs devices
VPC:
use-1: 52.44.148.136
euw-1: 52.18.131.55
aps-1: 52.77.200.241
sae-1: 54.233.193.15

non-VPC:
euw-1: 54.246.88.74
use-1: 54.204.47.201
aps-1: 54.251.110.178
sae-1: 54.232.124.137
5. Add a new hotspot to SOCIFI Dashboard
You will need to add MAC addresses of the controller and all AP's.
To add this equipment, please select Ruckus vSZ/vSCG under the settings when adding a new hotspot.
If Northbound Portal Interface (NBI) is used (API Access), enter the NBI Password to SOCIFI Dashboard under vSCG/vSZ API key.
If you have the he newer version of Ruckus (3.5 or above) please enter the Endpoint (API endpoint) and Password (API key) to the SOCIFI Dashboard. If the username is set in the controller enter also the User name (API username)
The API Endpoint is the public IP of the controller or WAN IP of the relevant firewall. The port 9080 shall be open respectively forwarded to the controller. If the load balancing or HA is used, please contact the SOCIFI support support@socifi.com

Step 1: Login to SOCIFI Dashboard
Step 2: Click on the "Hotspots" tab on the left sidebar
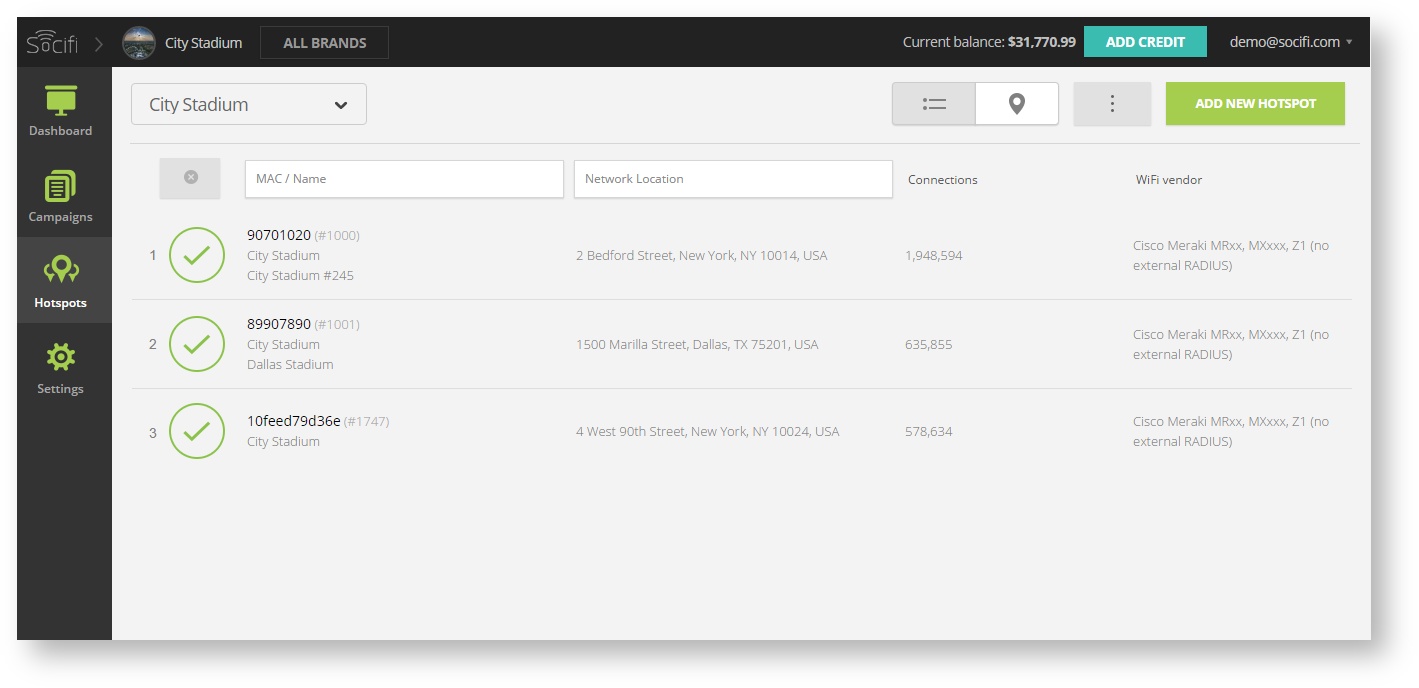
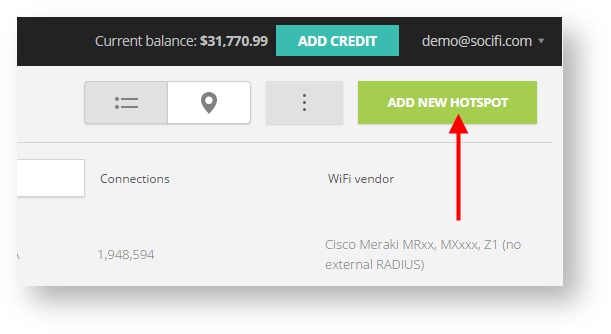
Step 3: Click on the “Add a new hotspot” button located on the top right corner on the screen (pictured below)
Note: A pop-up window will appear (below)
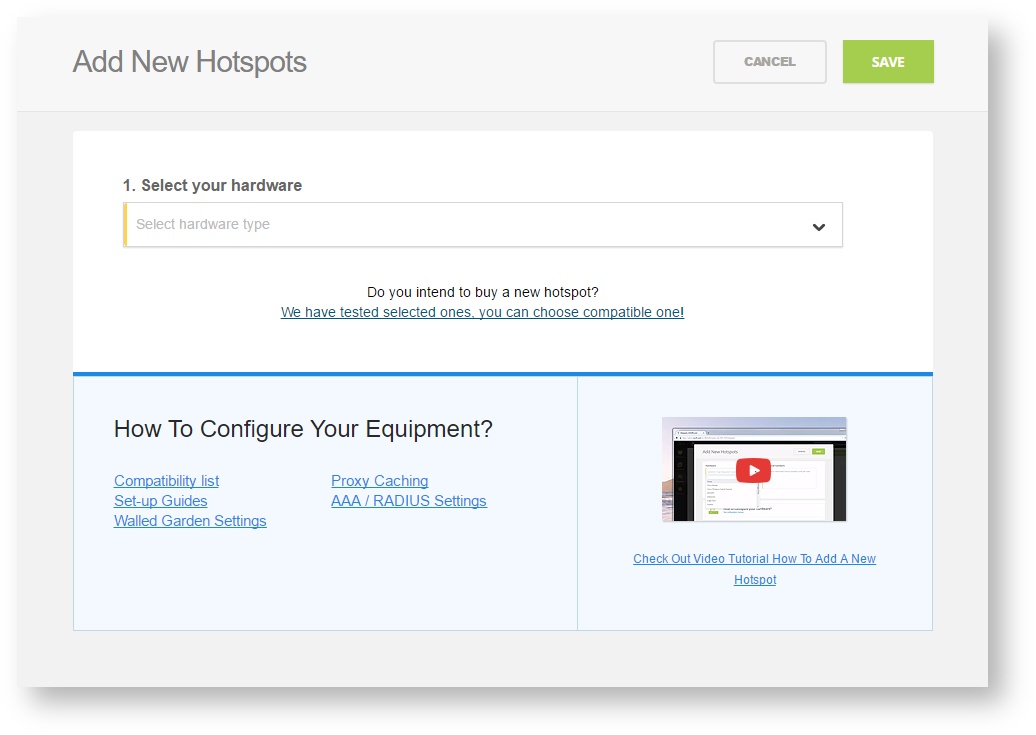
Step 4: Select the Wi-Fi hardware manufacturer from the drop down menu

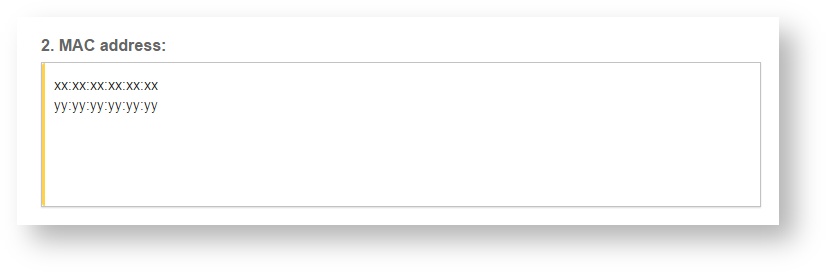
Step 5: Enter the serial number or MAC address (depending on the specific equipment manual) of your equipment. You can add multiple hotspots at once.
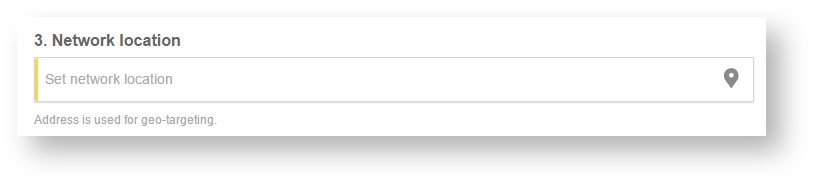
Step 6: Set your Network location (this step is essential for correct ad targeting)
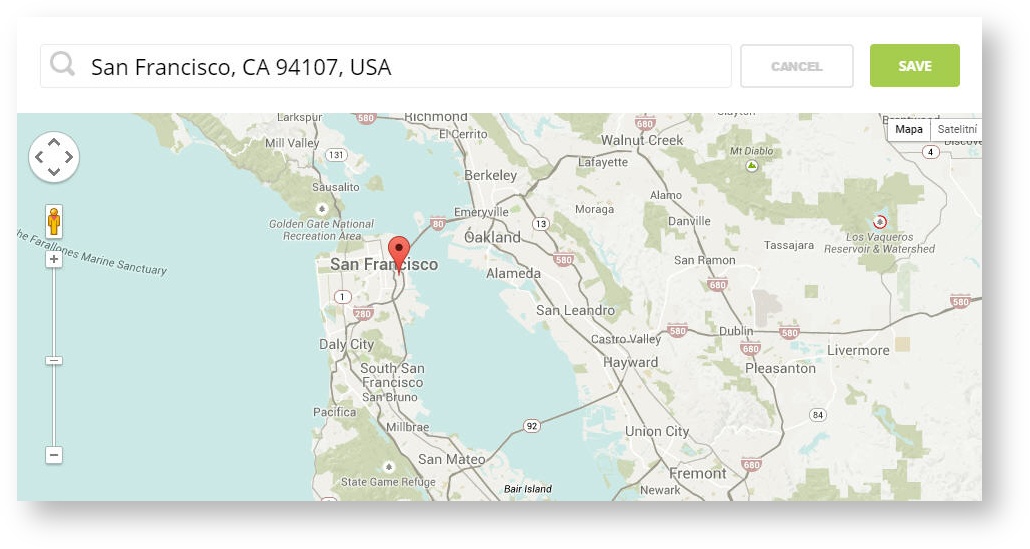
Step 7: In the pop-up window type your location or just move the marker on the map and click on the save button to confirm the selection. This address is used for ad GEO targeting.
Step 7: Click Save

Note: Newly added hotspot are marked as ![]() (Hotspot pending). After the first user connects to the hotspot via SOCIFI, the status will automatically change and appear as
(Hotspot pending). After the first user connects to the hotspot via SOCIFI, the status will automatically change and appear as ![]() (Active) within an hour. Get your first connections to test if it works properly.
(Active) within an hour. Get your first connections to test if it works properly.
