ZyXEL UAGx100 controller

Tested versions:
| Model | Type | Firmware version | Description |
|---|---|---|---|
| UAG4100 | AP + controller | V4.10(AAIZ.0) beta | any UAGx100* |
*ZyXEL confirms that all UAGx100 should be fully compatible. Tested on UAG2100 already.
*The release supporting SOCIFI platform is due in 2016. Should you need the fw before the oficial release, please contact ZyXEL support and ask for SOCIFI compliant release. The last known suitable is: UAG ZLD4.11
Default configuration:
- DHCP enabled
- internet on WAN port (P1)
- LAN1 is on ports P2 and P3, used for private network and management
- LAN2 is on ports P4 and P5, used for SOCIFI configuration. Both the external AP's and the internal WiFi can use the LAN2

RADIUS server setting
Go to Configuration menu > Object > AAA server and create the new Radius server item and set values as shown below
General Settings | |
|---|---|
| Name | radius |
| Description | SOCIFI radius servers |
| Authentication Server Settings | |
| Server Address | <your-primary-radius-by-location> |
| Authentication Port | 1812 |
| Backup Server Address | <your-secondary-radius-by-location> |
| Backup Authentication Port | 1812 |
| Key | socifi |
| Accounting Server settings | |
| Server Address | <your-primary-radius-by-location> |
| Accounting Port | 1813 |
| Backup Server Address | <your-secondary-radius-by-location> |
| Backup Accounting Port | 1813 |
| Key | socifi |
| Maximum retry count | 3 |
| Enable Accounting Interim update | enabled |
| Interim Interval | 10 |
| General Server Settings | |
| Timeout | 5 |
| NAS IP Address | 127.0.0.1 |
| NAS Identifer | Zyxel_<mac_address_of_WAN_interface> (see Add a new hotspot bellow) |
| Case-sensitive User Names | enabled |
| User Login settings | |
| Group Membership Attribute | Vendor-Specific (26) |
We recommend to use this set of RADIUS servers:

Go to Configuration > Object > Auth.Method create the new item and name it "ExternalRadiusMethod". Then under MethodList select "group radius".

In Configuration > System > WWW > Service Control go to Authentication > Client Authentication Method and set ExternalRadiusMethod value

WalledGarden setting
At first we need to enable Walled Garden list. Go to Configuration > Web Authentication > Walled Garden and tick Enable Walled Garden.

then continue to Domain/IP Base tab and add the DNS names as shown. Please note the Name field can't use the dot symbol (.) thus we'll use "_".

Enter following Walled garden ranges:
If you are a customer with the White Label solution, please add your custom domain (for example *.mycustomdomain.com) to the Walled Garden list.
*.socifi.com
*.facebook.com
*.akamaihd.net
*.akamai.net
*.edgecastcdn.net
twitter.com
*.twitter.com
*.twimg.com
*.fastly.net
*.li-cdn.net
*.cloudfront.net
facebook.com
*.fbcdn.net
*.instagram.com
*.cdninstagram.com
instagram.com
*.linkedin.com
*.licdn.com
linkedin.com
facebook.com and twitter.com (Yes, twice. Once with and once without the asterisk)
Enter following Walled garden ranges:
If you are a customer with the White Label solution, please add your custom domain (for example *.mycustomdomain.com) to the Walled Garden list.
*.socifi.com *.facebook.com *.akamaihd.net *.akamai.net *.edgecastcdn.net twitter.com *.twitter.com *.twimg.com *.fastly.net *.li-cdn.net *.cloudfront.net facebook.com *.fbcdn.net *.instagram.com *.cdninstagram.com instagram.com *.linkedin.com *.licdn.com linkedin.com
facebook.com and twitter.com (Yes, twice. Once with and once without the asterisk)
Work-around solution is to add the following IP ranges to the Walled Garden List:
13.32.0.0/15
13.35.0.0/16
13.54.63.128/26
13.59.250.0/26
34.195.252.0/24
35.162.63.192/26
52.15.127.128/26
52.46.0.0/18
52.52.191.128/26
52.57.254.0/24
52.66.194.128/26
52.78.247.128/26
52.84.0.0/15
52.199.127.192/26
52.212.248.0/26
52.220.191.0/26
52.222.128.0/17
54.182.0.0/16
54.192.0.0/16
54.230.0.0/16
54.233.255.128/26
54.239.128.0/18
54.239.192.0/19
54.240.128.0/18
70.132.0.0/18
71.152.0.0/17
99.84.0.0/16
143.204.0.0/16
204.246.164.0/22
204.246.168.0/22
204.246.174.0/23
204.246.176.0/20
205.251.192.0/19
205.251.249.0/24
205.251.250.0/23
205.251.252.0/23
205.251.254.0/24
216.137.32.0/19
Pages related to Walled Garden issues
- Cisco Meraki: Walled garden domain names not supported
- Ruckus Walled Garden CDN (DNS) domain behavior
- Captive Portal is not loading properly (Cap100)
- How to test that Walled Garden settings work properly?
Web Authentication (Captive portal)
Go to Configuration > Web Authentication > Add and set new Authentication Type using values from the table below:
| Web Authentication Type | |
|---|---|
| Type | Web Portal |
| General Settings | |
| Profile Name | SOCFI_external_web_auth_portal |
| Internal Web Portal (User Upload Page) | not checked |
| External Web Portal | checked |
| Login URL | http://connect.socifi.com |
| Logout URL | |
| Welcome URL | http://connect.socifi.com/api/v1/out/session |
| Session URL | |
| Error URL | http://connect.socifi.com/fail |

Click on the General tab and tick Enable Web Authentication. Then continue to Web Authentication Policy Sumary and deactivate existing rule for LAN2 and create new one using following values:
| General | |
|---|---|
| Enable Policy | checked |
| User Authentication Policy | |
| Incoming Interface | lan2 |
| Source Address | LAN2_SUBNET |
| Destination Address | any |
| Schedule | none |
| Authentication | required |
| Force User Authentication | enabled |
| Authentication Type | SOCIF_external_web_auth_portal |

Bandwidth Management
The upload and download speed limit can be set from SOCIFI Dashboard. In order to enable this remote control the Bandwidth Management needs to be turned on.
Go to Configuration > BWM and tick Enable BWM. That's all.

Add a new hotspot to SOCIFI Dashboard
You'll need to use the MAC address when adding new Hotspot in the Dashboard and for the NAS ID (see RADIUS server setting above).
Go to Configuration > Network > Interface > Ethernet and note down the MAC address for interface WAN1.

Step 1: Login to SOCIFI Dashboard
Step 2: Click on the "Hotspots" tab on the left sidebar
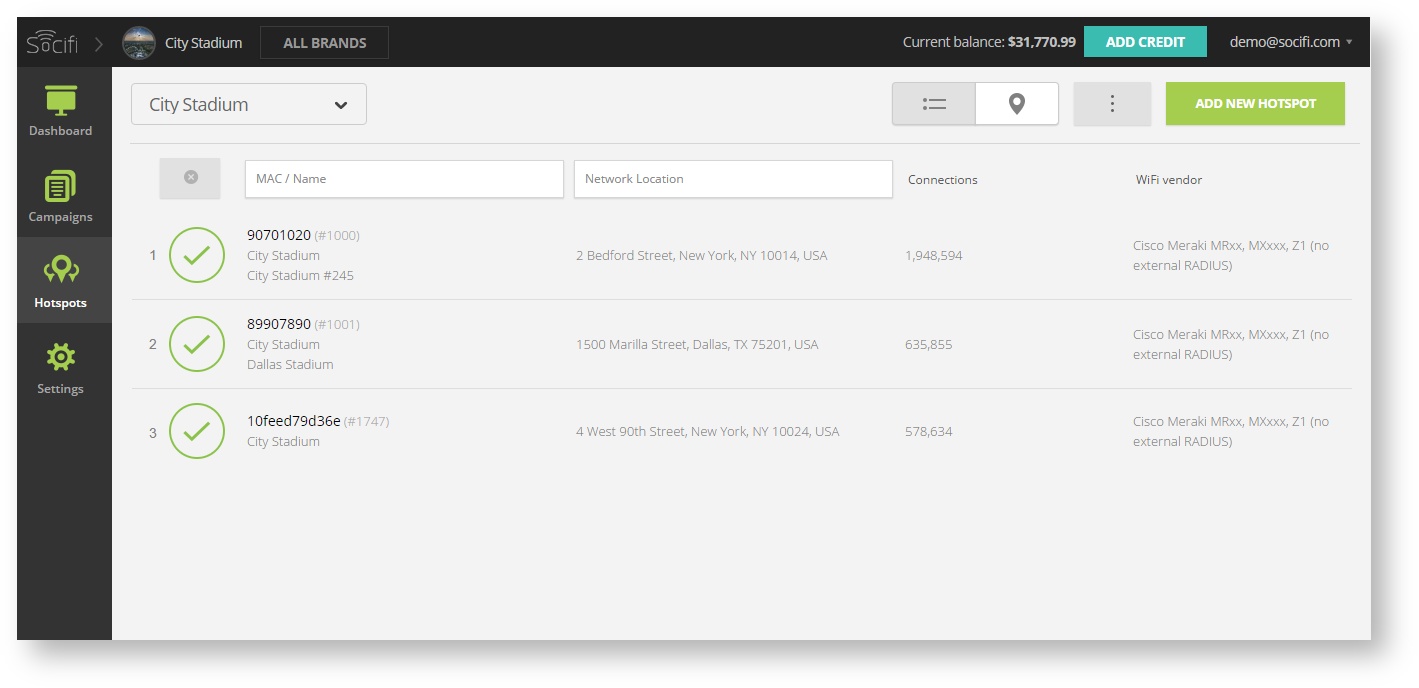
Step 3: Click on the “Add a new hotspot” button located on the top right corner on the screen (pictured below)
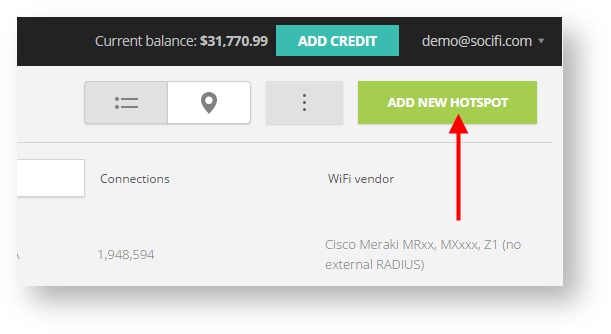
Note: A pop-up window will appear (below)
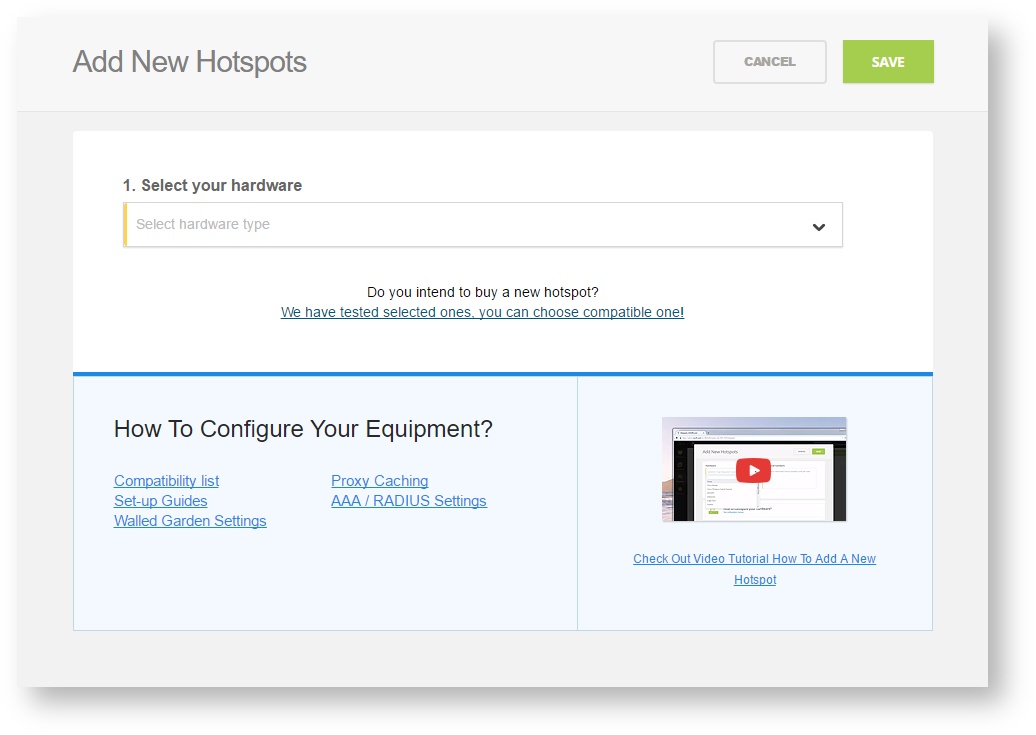
Step 4: Select the Wi-Fi hardware manufacturer from the drop down menu

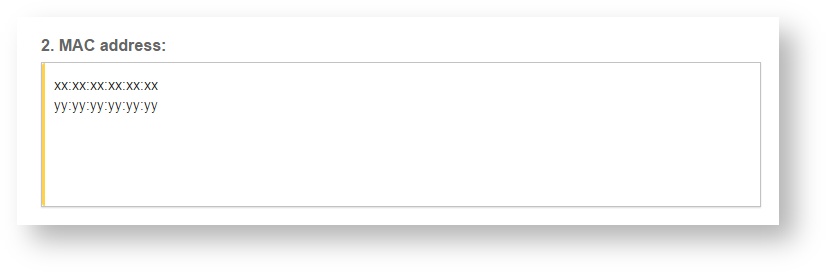
Step 5: Enter the serial number or MAC address (depending on the specific equipment manual) of your equipment. You can add multiple hotspots at once.
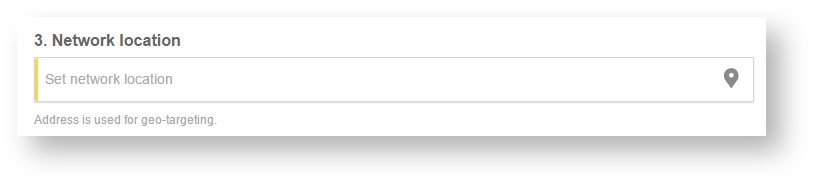
Step 6: Set your Network location (this step is essential for correct ad targeting)
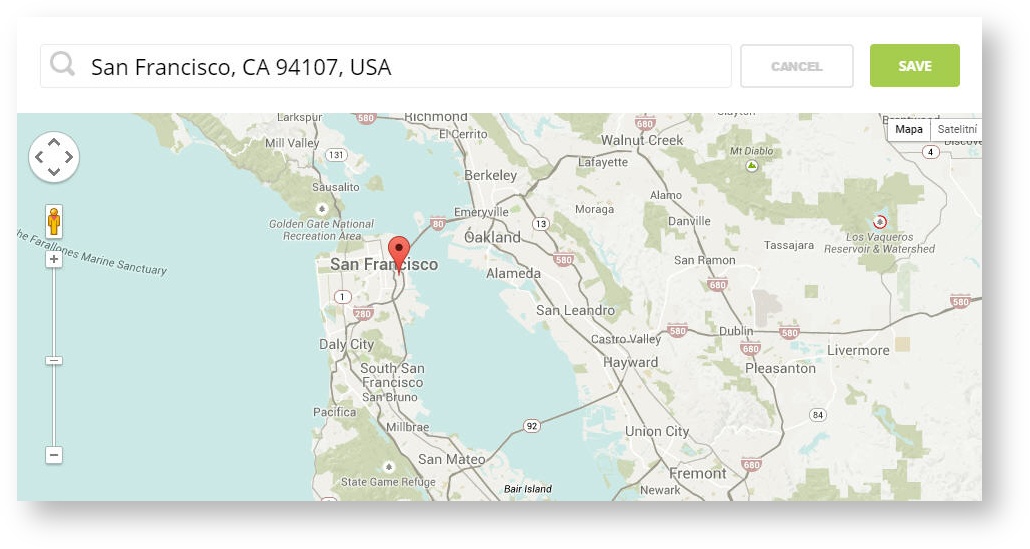
Step 7: In the pop-up window type your location or just move the marker on the map and click on the save button to confirm the selection. This address is used for ad GEO targeting.
Step 7: Click Save

Note: Newly added hotspot are marked as ![]() (Hotspot pending). After the first user connects to the hotspot via SOCIFI, the status will automatically change and appear as
(Hotspot pending). After the first user connects to the hotspot via SOCIFI, the status will automatically change and appear as ![]() (Active) within an hour. Get your first connections to test if it works properly.
(Active) within an hour. Get your first connections to test if it works properly.
