HUAWEI iMaster NCE-Campus Cloud Controller

The integration and testing were done using the iMaster NCE-Campus V300R021C10SPC100 Controller and AirEgine 5760-10 AP.

Pre-requirements - Get the site ready

To get the Internal captive portal redirection working seamlessly please issue a valid public security certificate and set an FQDN for the controller's IP:

How to set FQDN

How to issue and install the certificate

Prepare your site

Go to: 

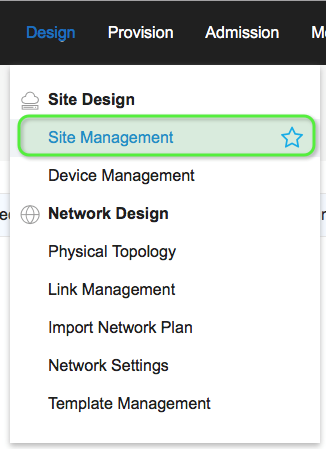
Design / Site  Design / Site Management

Create a new site if the required site does not exist

Site Management / All – create new

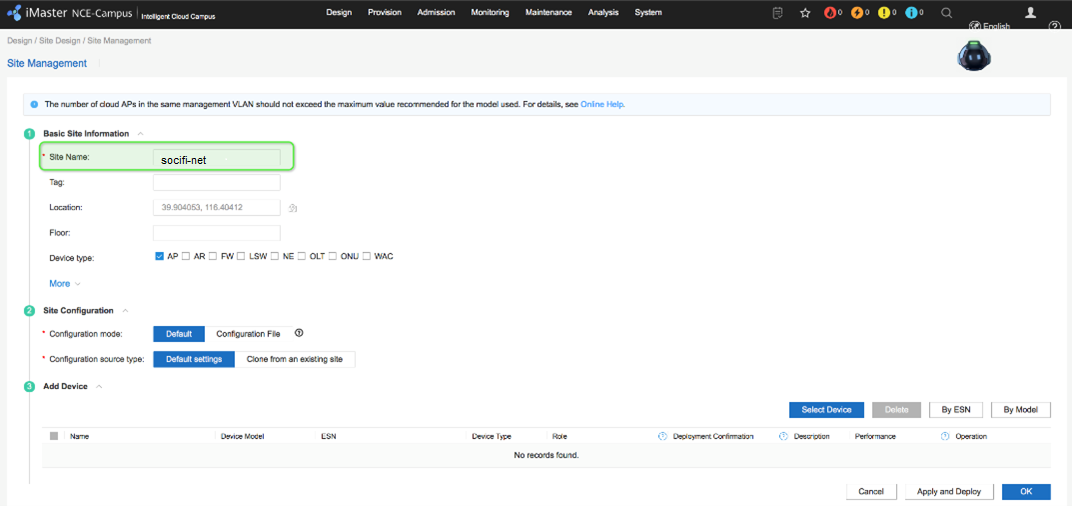
Set a Site Name and apply.


WAAS Setup

1.. Create a Default Bypass ACL

Go to:

Design / Network Design / Template Management


Choose:

Policy Template / ACL – create new

Set an ACL Name (socifi-portal_ACL) and add rules according to the list below.

Enter following Walled garden ranges:

If you are a customer with the White Label solution, please add your custom domain (for example *.mycustomdomain.com) to the Walled Garden list.

*.socifi.com
*.facebook.com
*.akamaihd.net
*.akamai.net
*.edgecastcdn.net
twitter.com
*.twitter.com
*.twimg.com
*.fastly.net
*.li-cdn.net
*.cloudfront.net
facebook.com
*.fbcdn.net
*.instagram.com
*.cdninstagram.com
instagram.com
*.linkedin.com
*.licdn.com
linkedin.com

facebook.com and twitter.com (Yes, twice. Once with and once without the asterisk)

 If you are you using Ruckus equipment, don't forget to set CDN IP ranges to the Walled Garden List.


Due to Ruckus firmware behavior end-user devices might not be able to reach some (mainly CDN and cloud) domains from walled garden list. This can cause wrong rendering of the captive portal.

The new IP ranges (indented in the list below) were added on April 2018.
Actual list of Amazon CloudFront (CDN) IPs is here: http://docs.aws.amazon.com/AmazonCloudFront/latest/DeveloperGuide/LocationsOfEdgeServers.html (direct link to IPs list in JSON format: https://ip-ranges.amazonaws.com/ip-ranges.json) 

As a workaround you have to add static IP's shown bellow to adjust firmware behavior and to be able to start monetizing your network immediately.

Work-around solution is to add the following IP ranges to the Walled Garden List:

13.32.0.0/15
13.35.0.0/16
13.54.63.128/26
13.59.250.0/26
34.195.252.0/24
35.162.63.192/26
52.15.127.128/26
52.46.0.0/18
52.52.191.128/26
52.57.254.0/24
52.66.194.128/26
52.78.247.128/26
52.84.0.0/15
52.199.127.192/26
52.212.248.0/26
52.220.191.0/26
52.222.128.0/17
54.182.0.0/16
54.192.0.0/16
54.230.0.0/16
54.233.255.128/26
54.239.128.0/18
54.239.192.0/19
54.240.128.0/18
70.132.0.0/18
71.152.0.0/17
99.84.0.0/16
143.204.0.0/16
204.246.164.0/22
204.246.168.0/22
204.246.174.0/23
204.246.176.0/20
205.251.192.0/19
205.251.249.0/24
205.251.250.0/23
205.251.252.0/23
205.251.254.0/24
216.137.32.0/19

 Want to Allow Google+ login?

The new Allow login through social networks does not include the Google login. The reason is that some Android based devices are not redirected to the Captive Portal when the user gets connected to WiFi network. In case you'd like to add it you need to do following:

  1. Check if your hotspot allows DNS names in the Walled garden. Some hotspots can use IP addresses only. See: Why DNS-based Walled Garden (and not IP-based)
  2. Allow Google+ login: Settings > Brand > Authentication > Allow login through social networks > Set on Allow Google login
  3. Add these walled garden domain into existing list:

Google+ Login DNS's

Please adopt same format your Walled garden is already using e.g. with or without the asterisk, separated by comma or space etc.

 For Cisco Meraki, Ruckus, Xirrus
*.googleapis.com
*.googleusercontent.com
*.gstatic.com
*.accounts.youtube.com
*.apis.google.com
*.accounts.google.com
*.l.google.com

The local accounts.google.XX domain must be added into the Walled Garden list. For example accounts.google.co.uk for United Kingdom, accounts.google.com.sg for Singapore, accounts.google.de for Germany etc. Google domains list you can find at https://ipfs.io/ipfs/QmXoypizjW3WknFiJnKLwHCnL72vedxjQkDDP1mXWo6uco/wiki/List_of_Google_domains.html

 For Open Mesh
googleapis.com,googleusercontent.com,gstatic.com,accounts.youtube.com,apis.google.com,accounts.google.com,l.google.com

The local accounts.google.XX domain must be added into the Walled Garden list. For example accounts.google.co.uk for United Kingdom, accounts.google.com.sg for Singapore, accounts.google.de for Germany etc. Google domains list you can find at https://ipfs.io/ipfs/QmXoypizjW3WknFiJnKLwHCnL72vedxjQkDDP1mXWo6uco/wiki/List_of_Google_domains.html

 For Mikrotik
/ip hotspot walled-garden
add dst-host=*.googleapis.com
add dst-host=*.googleusercontent.com
add dst-host=*.gstatic.com
add dst-host=*.accounts.youtube.com
add dst-host=*.apis.google.com
add dst-host=*.accounts.google.com
add dst-host=*.l.google.com
add dst-host=accounts.google.com

The local accounts.google.XX domain must be added into the Walled Garden list. For example accounts.google.co.uk for United Kingdom, accounts.google.com.sg for Singapore, accounts.google.de for Germany etc. Google domains list you can find at https://ipfs.io/ipfs/QmXoypizjW3WknFiJnKLwHCnL72vedxjQkDDP1mXWo6uco/wiki/List_of_Google_domains.html

 For DD-WRT
googleapis.com googleusercontent.com gstatic.com accounts.youtube.com apis.google.com accounts.google.com l.google.com

The local accounts.google.XX domain must be added into the Walled Garden list. For example accounts.google.co.uk for United Kingdom, accounts.google.com.sg for Singapore, accounts.google.de for Germany etc. Google domains list you can find at https://ipfs.io/ipfs/QmXoypizjW3WknFiJnKLwHCnL72vedxjQkDDP1mXWo6uco/wiki/List_of_Google_domains.html

Related pages:

The Splash Page is not triggered when Android devices connect to WiFi


Pages related to Walled Garden issues

The non-wildcard entries (eg. twitter.com) may be not added

2. Create a Third-Party RADIUS Server

Go to:

Design / Network Design / Template Management

Choose:

Policy Template / RADIUS Relay Server – create new

Set a RADIUS server set name (SocifiRadius) and add rules according to the instructions below.

It is necessary to use this set of SOCIFI RADIUS servers:

We recommend to use this set of RADIUS servers:


 List of RADIUS according to your location:
 For North America

RADIUS Server 1

rad-1-use-1.socifi.com or IP address: 52.7.148.174, Radius shared secret: socifi

RADIUS Server 2

rad-2-use-1.socifi.com or IP address: 52.55.217.23, Radius shared secret: socifi

 For Europe and Africa

RADIUS Server 1

rad-1-euw-1.socifi.com or IP address: 52.209.184.212, Radius shared secret: socifi

RADIUS Server 2

rad-2-euw-1.socifi.com or IP address: 52.50.155.202, Radius shared secret: socifi

 For Asia-Pacific

RADIUS Server 1

rad-1-euw-1.socifi.com or IP address: 52.209.184.212, Radius shared secret: socifi

RADIUS Server 2

rad-2-euw-1.socifi.com or IP address: 52.50.155.202, Radius shared secret: socifi

In order to have the Radius communication working fine, the IP addresses (above) and the ports 1812 Auth and 1813 Acc must be accessible.


Add both RADIUS servers and save.

3. Create an SSID

Go to:

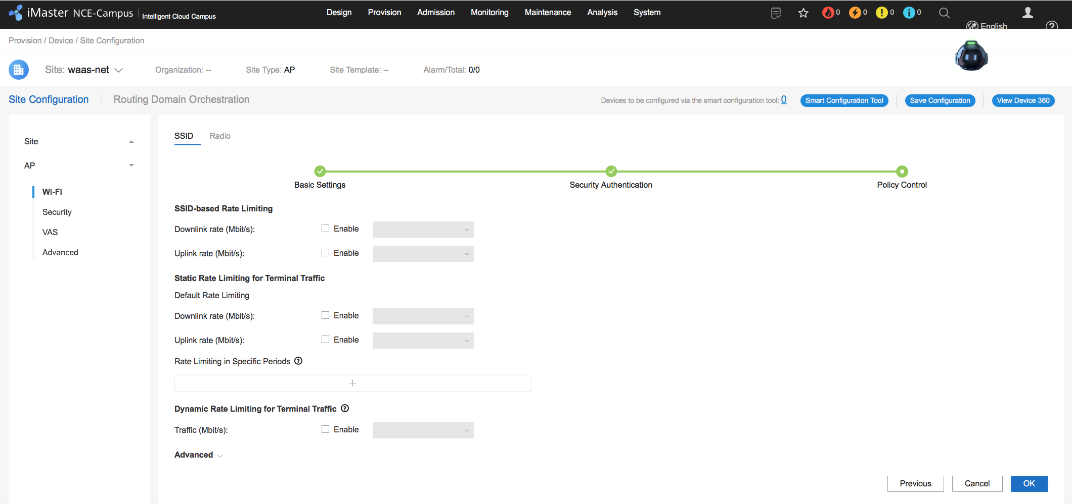
Provision / Device / Site Configuration

Choose: 

Site Configuration /AP / Wi-Fi / SSID – create new

Set an SSID name (socifi-ssid) at Basic Settings and follow the configuration wizard steps.

At Security Authentication set:

WLAN security policy

Open Network, Open+Portal authentication

Page pushing mode

Relay Authentication by cloud platform

Interconnection mode

RADIUS Relay

Third-party portal page auth...


Username

username

Password

password

Par. name for the auth. success red. URL

initurl

RADIUS relay server

SocifiRadius

Default permit rule

socifi-portal_ACL

Bypass policy

Auth. users continue using the network, and...

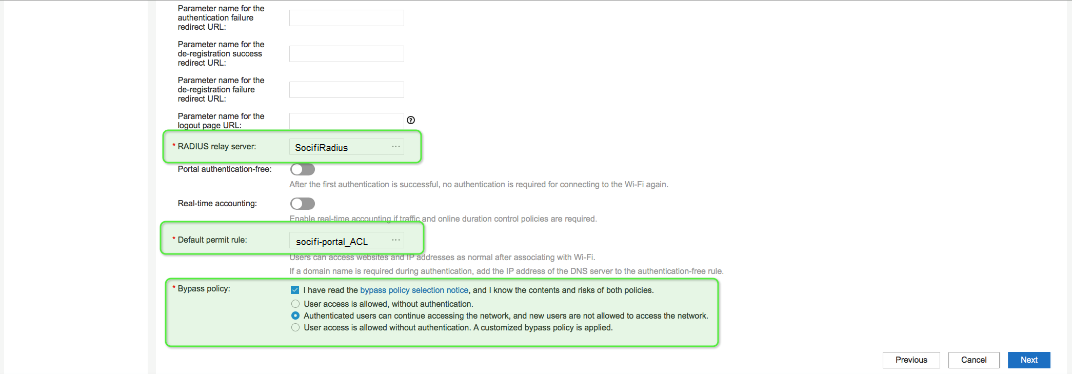
Next to Policy Control and OK.

4. Create a URL Template

Go to:

Design / Network Design / Template Management

Choose:

Policy Template / URL Template /  - create new

Name

SocifiURLtemplate

Template Type

Clou platform-based relay auth...

Parameters in template

keep default values

+ Add User-defined:


Name

HUW_3

Parameter

HUW_<site-name>


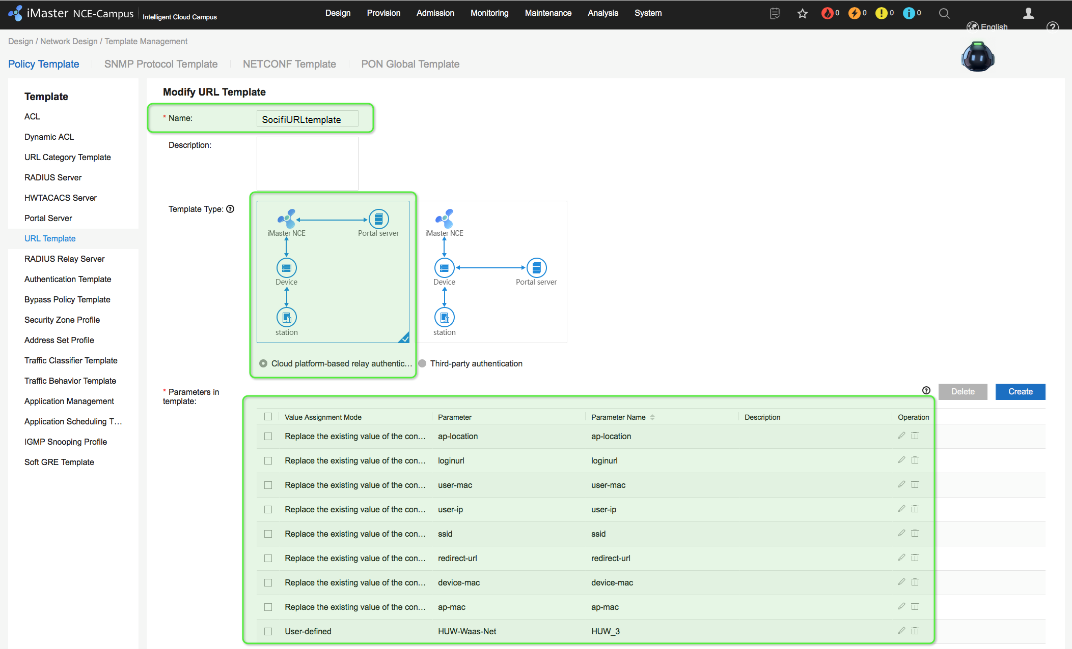
Parameter: HUW_<site-name> Use the site name defined in the pre-requirements step as the <site-name>


5. Creating a Portal Page Push Policy

Go to:

Admission / Admission Resources / Page Management

Choose:

Portal Page Push Policy - create new

Set the policy parameters:

Name

Socifi-RelayPagePolicy

Access Mode

Wireless

Push Page Rule


Authentication mode

Cloud platform based

Interconnection mode

RADIUS Relay

URL Template

WaasURLTemplate

Third-party auth. URL

https://connect.socifi.com

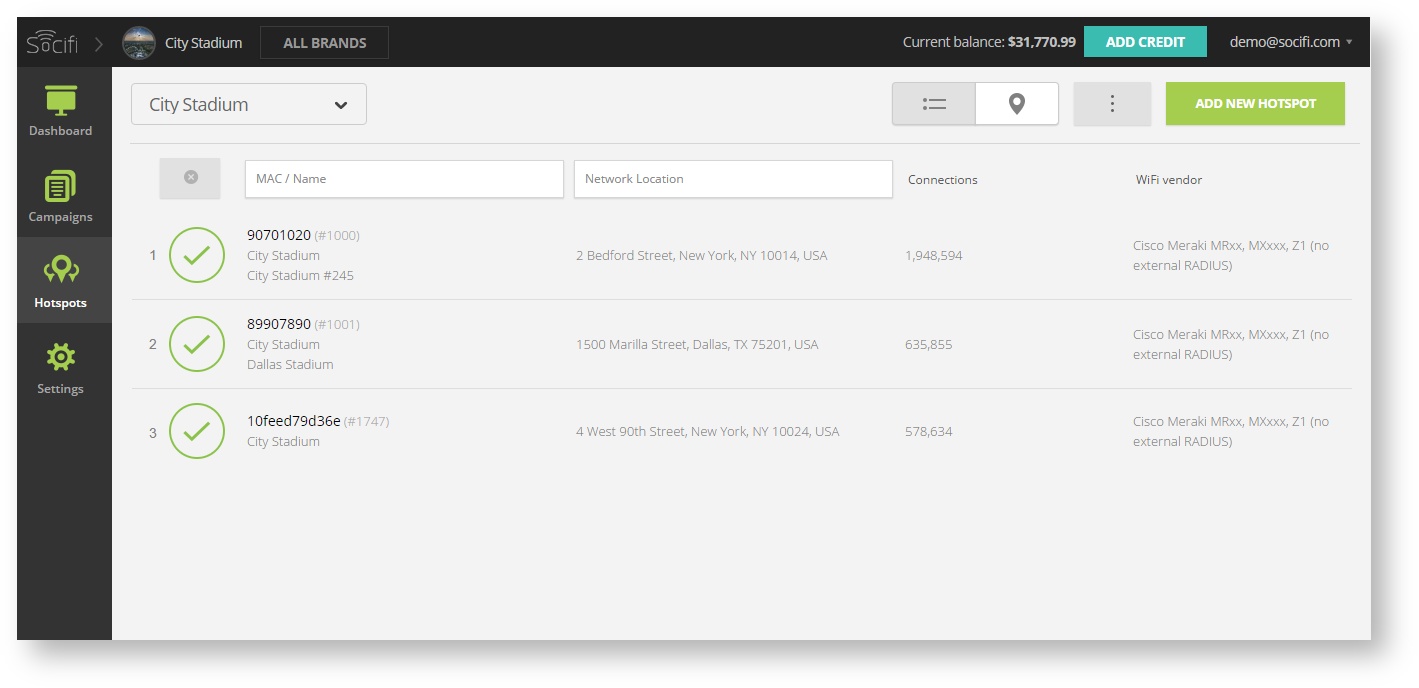
6. Register your hotspot

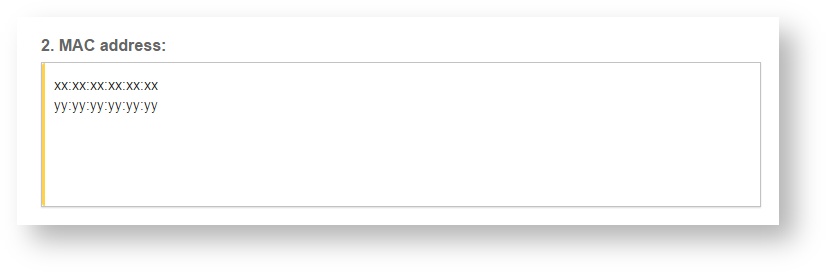
For registration in the SOCIFI Dashboard use the MAC addresses of the APs.  As the device vendor, select Huawei Campus.

Step 1: Login to SOCIFI Dashboard

Step 2: Click on the "Hotspots" tab on the left sidebar

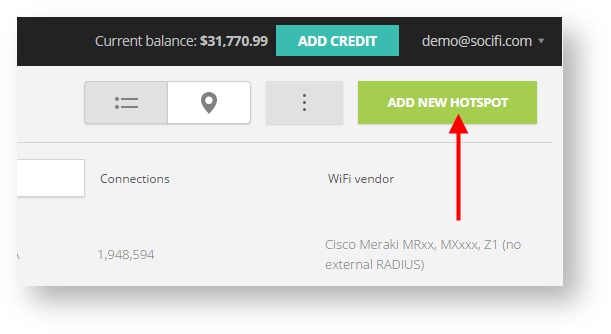
Step 3: Click on the “Add a new hotspot” button located on the top right corner on the screen (pictured below)

Note: A pop-up window will appear (below)

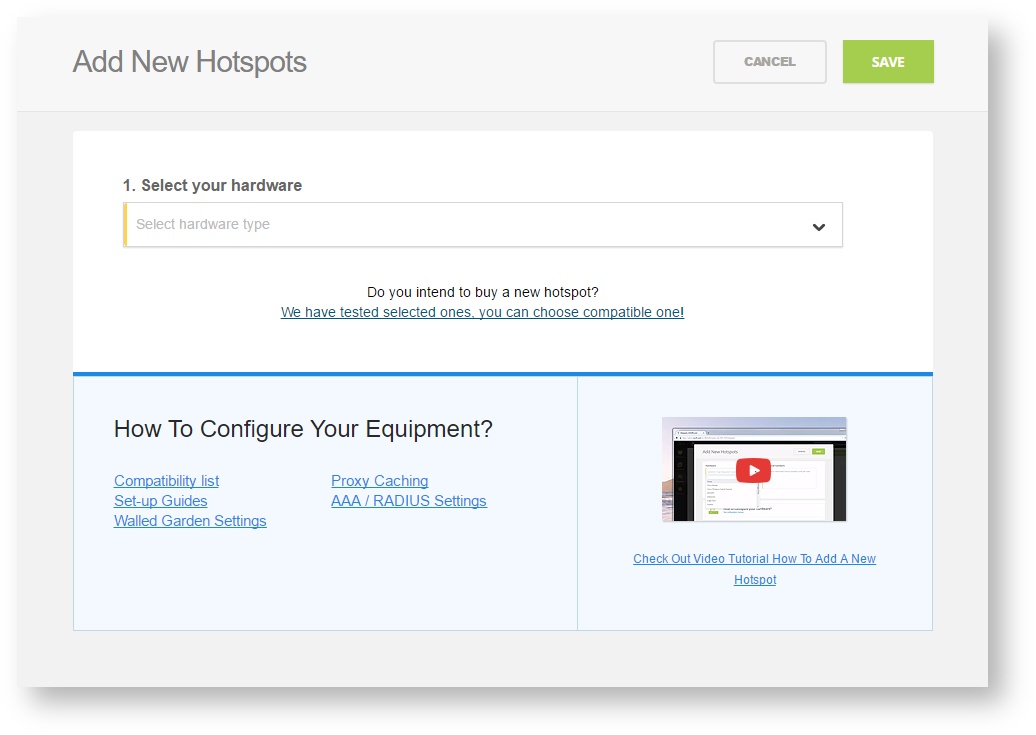
Step 4: Select the Wi-Fi hardware manufacturer from the drop down menu

Step 5: Enter the serial number or MAC address (depending on the specific equipment manual) of your equipment. You can add multiple hotspots at once.

Step 6: Set your Network location (this step is essential for correct ad targeting)

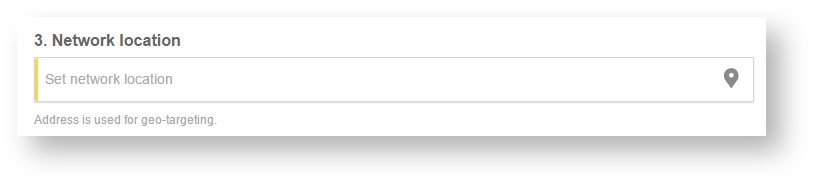
Step 7: In the pop-up window type your location or just move the marker on the map and click on the save button to confirm the selection. This address is used for ad GEO targeting.
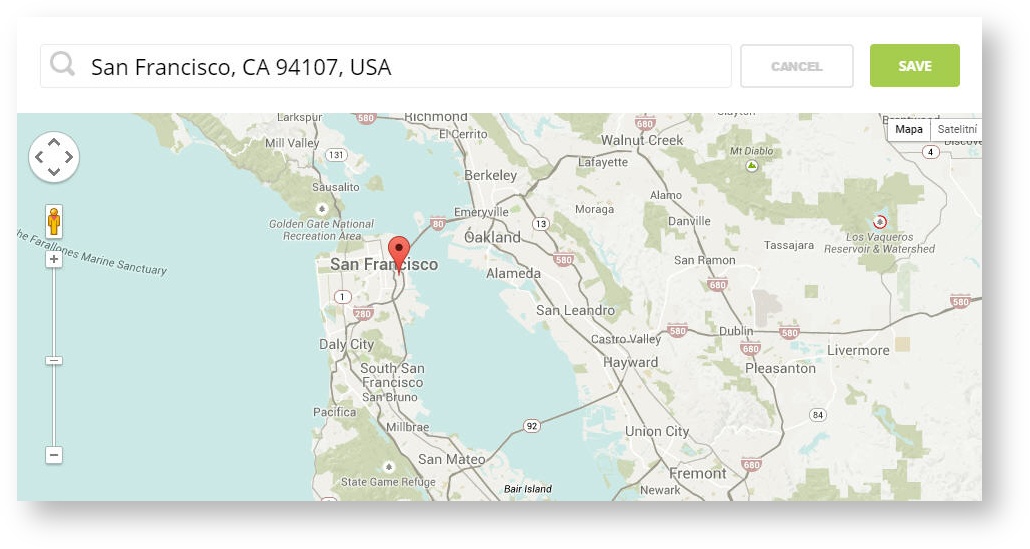
Step 7: Click Save

Note: Newly added hotspot are marked as  (Hotspot pending). After the first user connects to the hotspot via SOCIFI, the status will automatically change and appear as  (Active) within an hour. Get your first connections to test if it works properly.