Cisco Systems controllers configuration
Cisco 5500 Series
Tested versions:
| Model | Type | Firmware version | Description |
|---|---|---|---|
| 5508 2504 | controller | AirOS version 7.6.120.0 | |
| 5520 | controller | AirOS version 8.2.100.0 | (bandwidth per client) |
This solution for 5500 Series is similar to 2500 Series. Therefore, this manual does not contain a detailed step-by-step guide for a complete setup. Only the settings needed for SOCIFI are described below.
The solution uses WalledGarden type ACL/IP rules, based on fixed defined IP host addresses and large open subnets for external service usage. This solution is not fully valid with WalledGarden functionality based on domain names, it partly replaces it. Due to dynamic IP address-assigning to external services provided by WalledGarden (not static IP addresses), some information may become unavailable and may restrict functions. Therefore, it needs to regularly supervise list of ACL IP addresses and subnets and record all changes to it.
Setting
ACL - preACL
To achieve proper functionalities, you need to define a preACL list of allowed IP addresses. Allowed IP addresses have to be reachable by the system without any authentication. Cisco does not support DNS Walled Garden so far. In the tab below there are defined a list of needed IP addresses and subnets for every service.
| SOCIFI | SOCIFI's CDN | Facebook/Instagram | |||
|---|---|---|---|---|---|
54.246.88.74 / 255.255.255.255 52.51.203.246 / 255.255.255.255 54.204.47.201 / 255.255.255.255 52.44.151.156 / 255.255.255.255 54.232.124.137 / 255.255.255.255 54.232.88.133 / 255.255.255.255 54.251.110.178 / 255.255.255.255 | 13.32.0.0 / 255.254.0.0 13.35.0.0 / 255.255.0.0 13.54.63.128 / 255.255.255.192 13.59.250.0 / 255.255.255.192 13.224.0.0 / 255.252.0.0 34.195.252.0 / 255.255.255.0 35.162.63.192 / 255.255.255.192 52.15.127.128 / 255.255.255.192 52.46.0.0 / 255.255.192.0 52.52.191.128 / 255.255.255.192 52.57.254.0 / 255.255.255.0 52.66.194.128 / 255.255.255.192 52.78.247.128 / 255.255.255.192 52.84.0.0 / 255.254.0.0 52.199.127.192 / 255.255.255.192 52.212.248.0 / 255.255.255.192 52.220.191.0 / 255.255.255.192 52.222.128.0 / 255.255.128.0 54.182.0.0 / 255.255.0.0 54.192.0.0 / 255.255.0.0 54.230.0.0 / 255.255.0.0 54.233.255.128 / 255.255.255.192 54.239.128.0 / 255.255.192.0 54.239.192.0 / 255.255.224.0 54.240.128.0 / 255.255.192.0 70.132.0.0 / 255.255.192.0 71.152.0.0 / 255.255.128.0 99.84.0.0 / 255.255.0.0 143.204.0.0 / 255.255.0.0 204.246.164.0 / 255.255.252.0 204.246.168.0 / 255.255.252.0 204.246.174.0 / 255.255.254.0 204.246.176.0 / 255.255.240.0 205.251.192.0 / 255.255.224.0 205.251.249.0 / 255.255.255.0 205.251.250.0 / 255.255.254.0 205.251.252.0 / 255.255.254.0 205.251.254.0 / 255.255.255.0 216.137.32.0 / 255.255.224.0 | 216.239.32.0 / 255.255.224.0 | 31.13.24.0 / 255.255.248.0 31.13.64.0 / 255.255.192.0 45.64.40.0 / 255.255.252.0 66.220.144.0 / 255.255.240.0 69.63.176.0 / 255.255.240.0 69.171.224.0 / 255.255.224.0 74.119.76.0 / 255.255.252.0 103.4.96.0 / 255.255.252.0 129.134.0.0 / 255.255.0.0 157.240.0.0 / 255.255.0.0 173.252.64.0 / 255.255.192.0 179.60.192.0 / 255.255.252.0 185.60.216.0 / 255.255.252.0 204.15.20.0 / 255.255.252.0 | 69.12.56.0 / 255.255.248.0 103.252.112.0 / 255.255.252.0 104.244.40.0 / 255.255.248.0 185.45.4.0 / 255.255.248.0 188.64.224.0 / 255.255.248.0 192.44.68.0 / 255.255.254.0 192.48.236.0 / 255.255.254.0 192.133.76.0 / 255.255.252.0 199.16.156.0 / 255.255.252.0 199.59.148.0 / 255.255.252.0 199.69.58.0 / 255.255.254.0 199.96.56.0 / 255.255.248.0 202.160.128.0 / 255.255.252.0 192.229.128.0 / 255.255.128.0 93.184.208.0 /255.255.240.0 | 91.225.248.0 / 255.255.254.0 103.20.94.0 / 255.255.254.0 108.174.0.0 / 255.255.252.0 108.174.4.0 / 255.255.255.0 108.174.8.0 / 255.255.252.0 108.174.12.0 / 255.255.254.0 144.2.0.0 / 255.255.252.0 144.2.192.0 / 255.255.255.0 216.52.16.0 / 255.255.254.0 216.52.18.0 / 255.255.255.0 216.52.20.0 / 255.255.254.0 216.52.22.0 / 255.255.255.0 65.156.227.0 / 255.255.255.0 8.39.53.0 / 255.255.255.0 185.63.144.0 / 255.255.255.0 185.63.147.0 / 255.255.255.0 199.101.161.0 / 255.255.255.0 64.152.25.0 / 255.255.255.0 8.22.161.0 / 255.255.255.0 |
Each IP host (subnet) has be defined in two ways (IN/OUT). Set of ACL is called preACL_permit.
Example of host rules "52.51.203.246 / 255.255.255.255":
config acl rule add preACL_permit 1
config acl rule source port range preACL_permit 1 0 65535
config acl rule direction preACL_permit 1 in
config acl rule action preACL_permit 1 permit
config acl rule destination port range preACL_permit 1 0 65535
config acl rule destination address preACL_permit 1 52.51.203.246 255.255.255.255

config acl rule add preACL_permit 2
config acl rule source port range preACL_permit 2 0 65535
config acl rule source address preACL_permit 2 52.51.203.246 255.255.255.255
config acl rule direction preACL_permit 2 out
config acl rule action preACL_permit 2 permit
config acl rule destination port range preACL_permit 2 0 65535
In the end, you need to create and apply a set of ACL rules:
config acl create preACL_permit
config acl apply preACL_permit
Related pages
Webpage authentication
To redirect to external web portal uses the following commands:
config custom-web ext-webauth-url http://connect-ip.socifi.com
config custom-web webauth-type external
Note: The ext-webauth-url has been changed from http://connect.socifi.com to http://connect-ip.socifi.com

... and switch of PopUp logout window (this cannot be done via web interface)
config custom-web logout-popup disable
RADIUS
You must set Auth and Acc part in the basic settings of authentication thru radius server. For European radius servers use following IP addresses:
| Priority | IP | DNS name |
|---|---|---|
| primary | 52.209.184.212 | rad-1-euw-1.socifi.com |
| secondary | 52.50.155.202 | rad-2-euw-1.socifi.com |
We recommend to use this set of RADIUS servers:
Auth settings provide:
config radius auth add 1 52.209.184.212 1812 ascii socifi
config radius auth retransmit-timeout 1 2
config radius auth network 1 enable
config radius auth management 1 enable
config radius auth mac-delimiter colon
config radius auth enable 1

config radius auth add 2 52.50.155.202 1812 ascii socifi
config radius auth retransmit-timeout 2 2
config radius auth network 2 enable
config radius auth management 2 enable
config radius auth mac-delimiter colon
config radius auth enable 2
... and Acc settings provide:
config radius acct add 1 52.209.184.212 1813 ascii socifi
config radius acct retransmit-timeout 1 2
config radius acct network 1 enable
config radius acct mac-delimiter colon
config radius acct enable 1

config radius acct add 2 52.50.155.202 1813 ascii socifi
config radius acct retransmit-timeout 2 2
config radius acct network 2 enable
config radius acct mac-delimiter colon
config radius acct enable 2
Wireless - WLAN
Wi-Fi settings is regular, the only exception is to turn off all WEP and WAP authentication. Wi-Fi is set as "Open" without any key and any authentication.
Authentication is added via external WEP portal, RADIUS and preACL as follows (example for WLANID=1):
config wlan security web-passthrough acl 1 preACL_permit

config wlan security web-auth acl 1 preACL_permit

config wlan security web-auth server-precedence 1 local radius ldap
config wlan security web-auth enable 1

config wlan radius_server auth add 1 1
config wlan radius_server overwrite-interface enable 1
config wlan radius_server acct add 1 1
config wlan radius_server acct interim-update enable 1
config wlan radius_server acct interim-update 600 1


"Allow AAA Override" has to be enabled in the "Advanced" tab. This will enable Bandwidth Limit Management.

For the WLC identification in the log system must be set NAS-ID on General page:

The MAC address can be found on the page "CONTROLLER / Inventory" as "Burned-in MAC Address" The value This value consists of "Cisco" and "MAC Address" fields. The values have to be separated by the underline. Example: "Cisco_64:D8:14:DB:09:C0".

Interface - virtual address
You need to check the Virtual address IP settings. The address can be any, shall be used for re-verification.
Example:
config interface address virtual 10.0.3.1

Network management - web-auth secure
In the end, you need to forbid SSL version virtual web login page
config network web-auth secureweb disable
You need to reboot the device to make sure all changes take effect. Without the reboot, the WLC will not work properly.

Add a new hotspot to SOCIFI Dashboard
You will need to add MAC addresses of the controller and all AP's.
To add this equipment, please select Cisco Wireless Control System as the hardware type when adding a new hotspot.
For devices with AirOS version 8.5. and higher, please select Cisco Wireless Control System 8.5
Step 1: Login to SOCIFI Dashboard
Step 2: Click on the "Hotspots" tab on the left sidebar
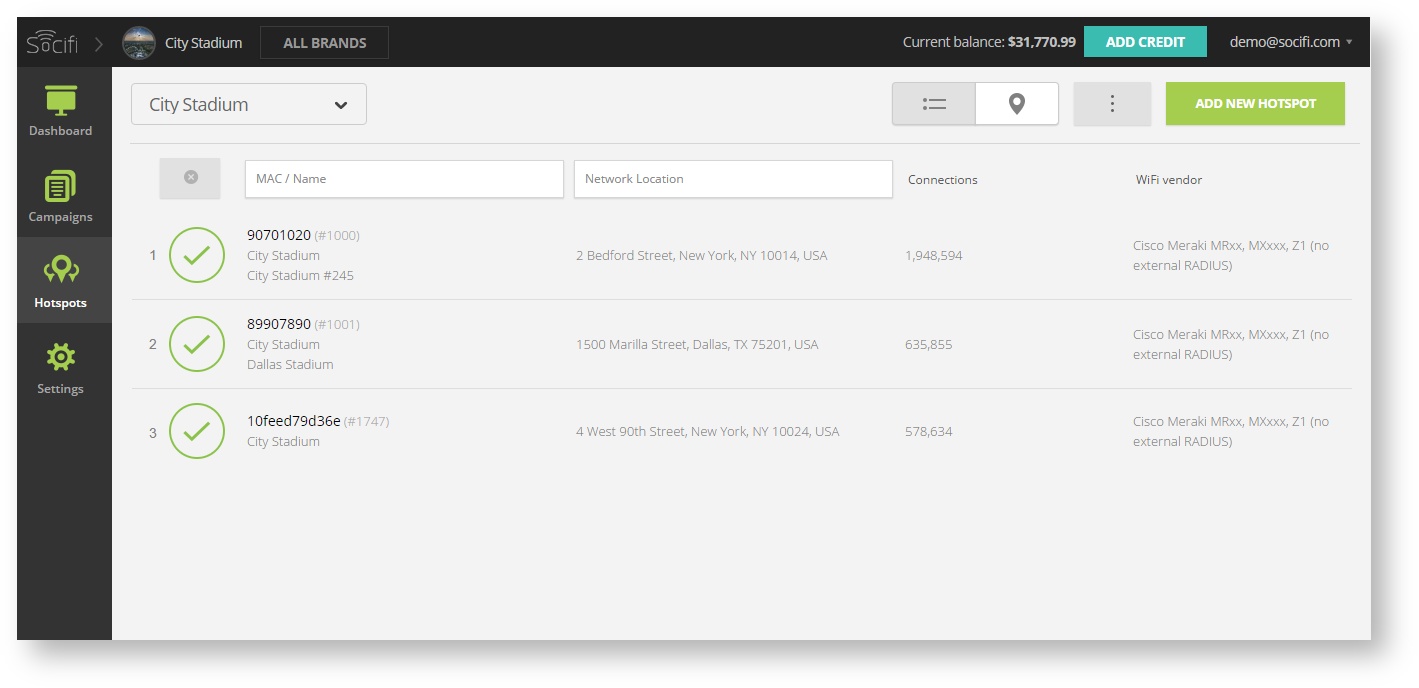
Step 3: Click on the “Add a new hotspot” button located on the top right corner on the screen (pictured below)
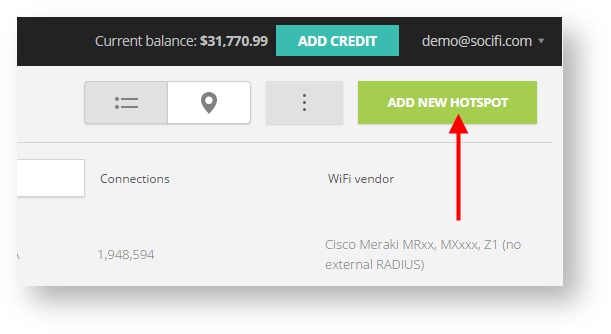
Note: A pop-up window will appear (below)
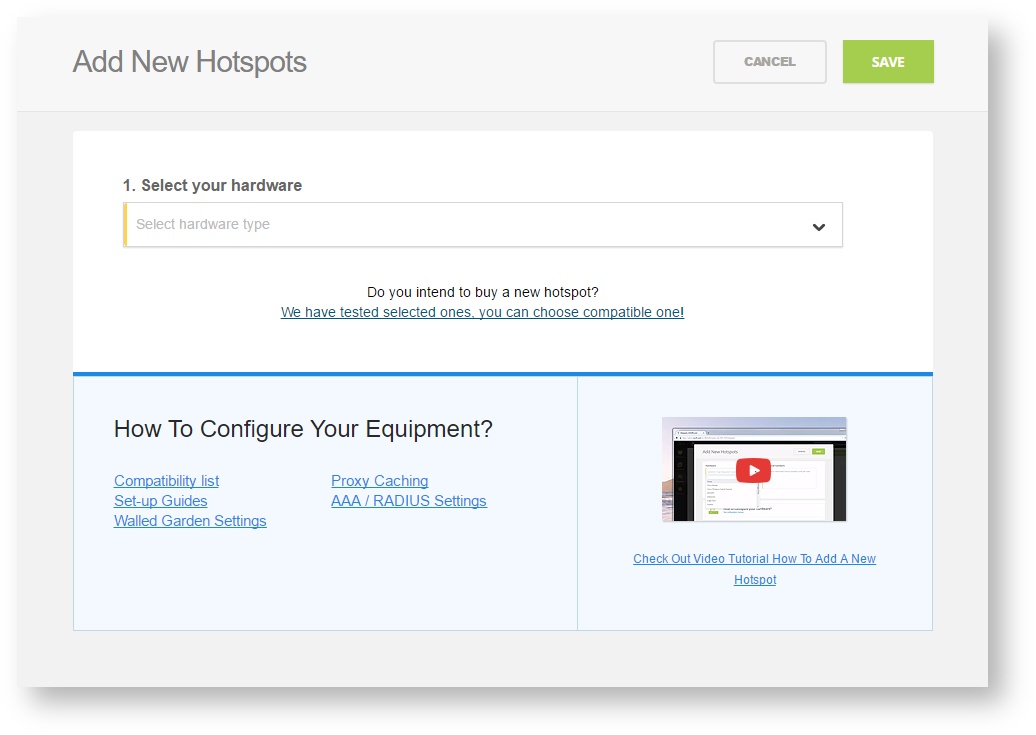
Step 4: Select the Wi-Fi hardware manufacturer from the drop down menu

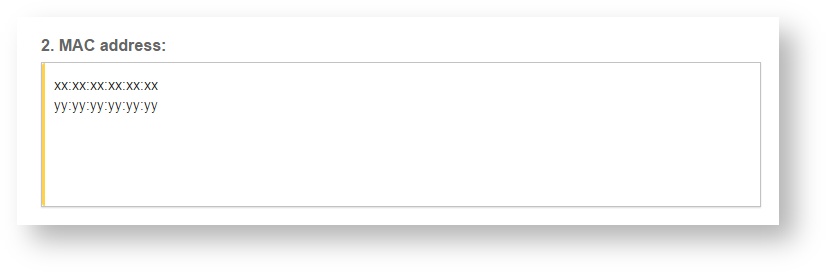
Step 5: Enter the serial number or MAC address (depending on the specific equipment manual) of your equipment. You can add multiple hotspots at once.
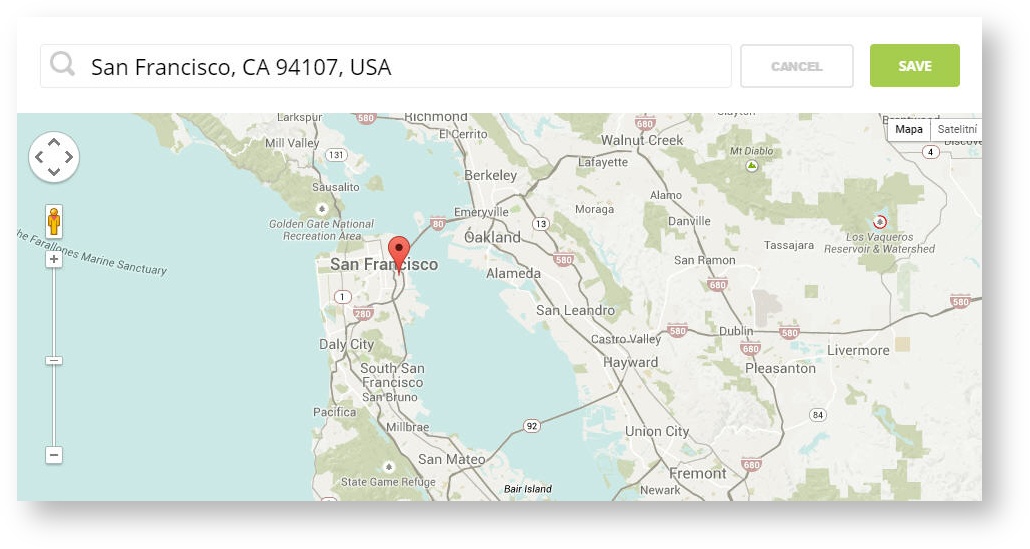
Step 6: Set your Network location (this step is essential for correct ad targeting)
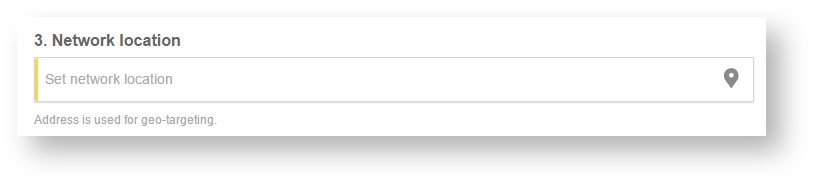
Step 7: In the pop-up window type your location or just move the marker on the map and click on the save button to confirm the selection. This address is used for ad GEO targeting.
Step 7: Click Save

Note: Newly added hotspot are marked as ![]() (Hotspot pending). After the first user connects to the hotspot via SOCIFI, the status will automatically change and appear as
(Hotspot pending). After the first user connects to the hotspot via SOCIFI, the status will automatically change and appear as ![]() (Active) within an hour. Get your first connections to test if it works properly.
(Active) within an hour. Get your first connections to test if it works properly.

Related pages
- External Web Authentication with FlexConnect Local Switching Deployment Guide
http://www.cisco.com/c/en/us/support/docs/wireless/flex-7500-series-wireless-controllers/113605-ewa-flex-guide-00.html
- Troubleshooting Web Authentication on a Wireless LAN Controller (WLC)
http://www.cisco.com/c/en/us/support/docs/wireless/5500-series-wireless-controllers/108501-webauth-tshoot.html