Aruba (IAP virtual controller mode) configuration
Tested versions:
| Model | Type | Firmware version | Description |
|---|---|---|---|
| APIN0225 | Dualband AP + virtual controler | 6.3.1.4-4.0.0.6_44126 | also known as W-AP225 |
Aruba (DELL) AP-220 series uses own captive portal. It is also possible to redirect to the external Splash page. Built-in Virtual Controller enables to manage more than one AP.
NOTE! You can add only 16 domain names to the WalledGarden.
This limitation doesn't allow you to use social media logins (Facebook, Google+, Twitter). We cannot control this limit.
Basic setting
Default setting is DHCP client. The system is open with default setting of WiFi for access to the AP. You need to reconfigure with built-in wizard in the web console.
In the web console run wizard to set WiFi and captive portal. To launch wizard on select in the left top corner tab Network and add "New".
1. on the first tab WLAN Settings set:
Name (SSID) name of your WiFi network (visible to end user)
Primary usage select Guest

2. on the second tab VLAN select:
Client IP assignment select Virtual Controller managed
Client VLAN assignment Default

3. on the third tab Security follow:
Splash page type select External
Captive portal select New
| Name: | Socifi Portal Connect |
| Type: | Radius Authentication |
| IP or hostname: | connect.socifi.com |
| URL: | / |
| Port: | 80 |
| Use https: | Disabled |
| Captive Portal failure: | Deny internet |
| Automatic URL Whitelisting: | Disabled |
| Redirect URL: | keep empty |

confirm with OK
WISPr keep Disabled
MAC authentication set Disabled
Auth server 1 select New
| Name: | rad-1 |
| IP address: | enter the appropriate RADIUS server by region |
| Auth port: | 1812 |
| Accounting port: | 1813 |
| Shared key: | socifi |
| Retype key: | socifi |
| Timeout: | 5 sec. |
| Retry count: | 3 |
| RFC 3576: | Disabled |
| NAS IP address: | keep empty |
| NAS identifier: | aruba |
| Dead time: | 5 min. |
| DRP IP: | keep empty |
| DRP mask: | keep empty |
| DRP VLAN: | keep empty |
| DRP Gateway: | keep empty |
We recommend to use this set of RADIUS servers:

confirm with OK
Auth server 2 select New
Setting the same as Auth server 1 just set as the secondary server.
Load balancing set Disabled
Reauth interval set 0 min.
Accounting select Enabled
Accounting mode set Authentication
Accounting interval set 0 min.
Blacklisting select Disable
Walled garden click on highlighted part open and set
If you are customer with White Label solution, please add your custom domain (for example mycustomdomain.com) to the Walled Garden list.
socifi.com
facebook.com
akamaihd.net
akamai.net
edgecastcdn.net
twitter.com
twimg.com
fastly.net
li-cdn.net
cloudfront.net
fbcdn.net
instagram.com
cdninstagram.com
linkedin.com
licdn.com
You can add only 16 domain names to the WalledGarden, this limits full functionality of SOCIFI. You cannot use the Social media login.

Disable if uplink type is do not select anything
Encryption set Disabled
Result is

4. on the fourth tab Access follow:
Access Rules select Unrestricted

Add a new hotspot to SOCIFI Dashboard
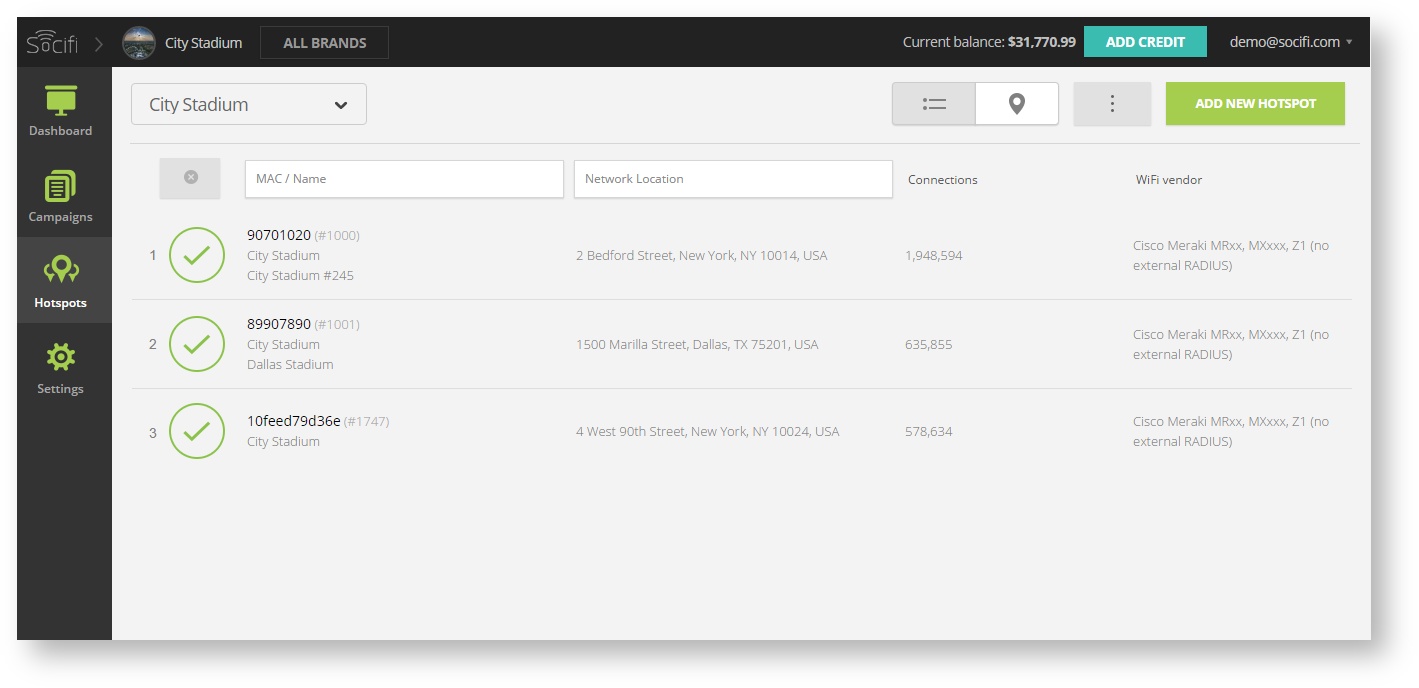
Step 1: Login to SOCIFI Dashboard
Step 2: Click on the "Hotspots" tab on the left sidebar
Step 3: Click on the “Add a new hotspot” button located on the top right corner on the screen (pictured below)
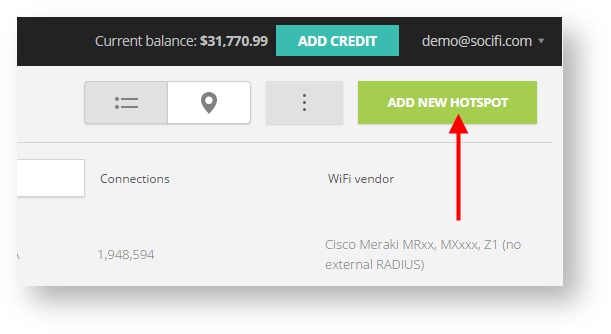
Note: A pop-up window will appear (below)
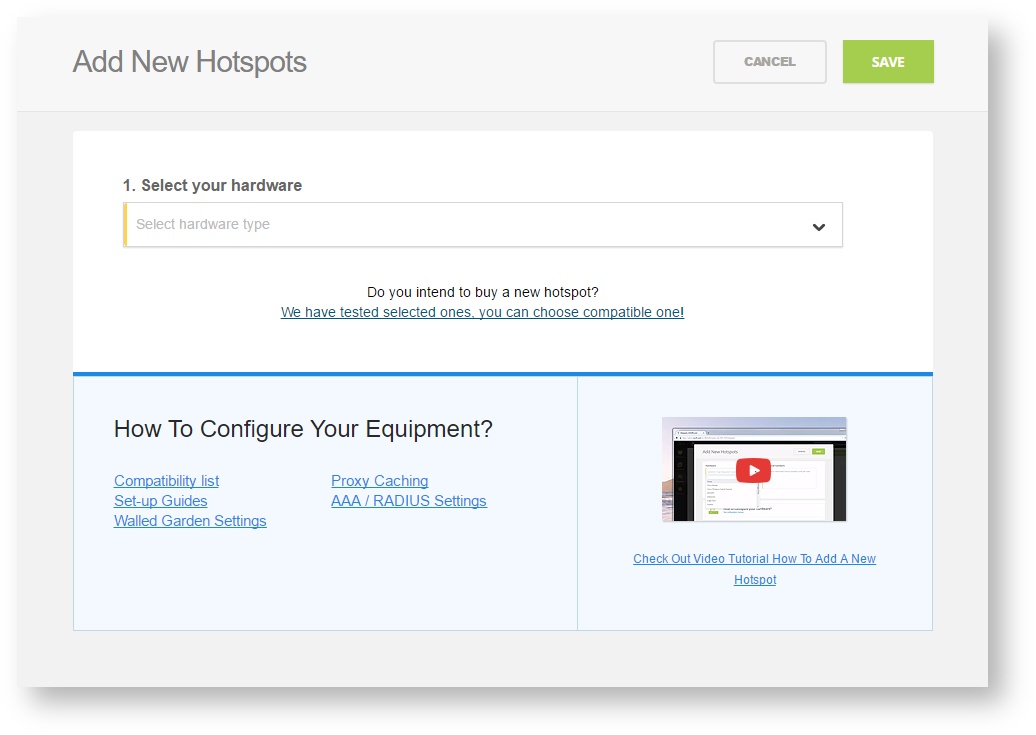
Step 4: Select the Wi-Fi hardware manufacturer from the drop down menu

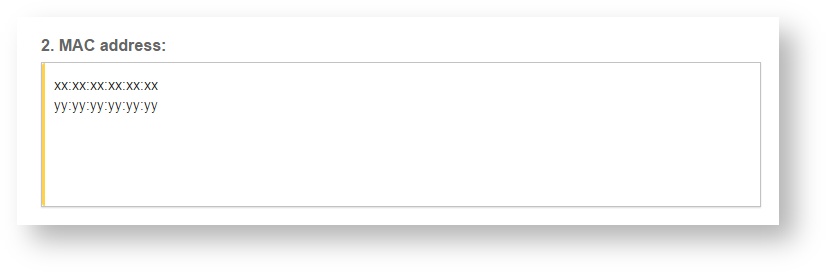
Step 5: Enter the serial number or MAC address (depending on the specific equipment manual) of your equipment. You can add multiple hotspots at once.
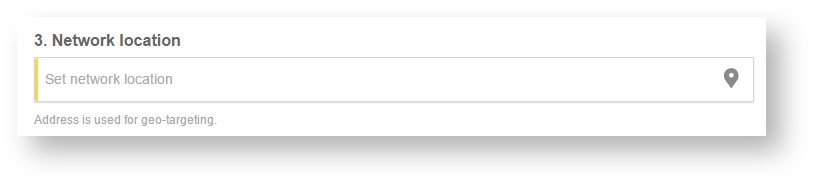
Step 6: Set your Network location (this step is essential for correct ad targeting)
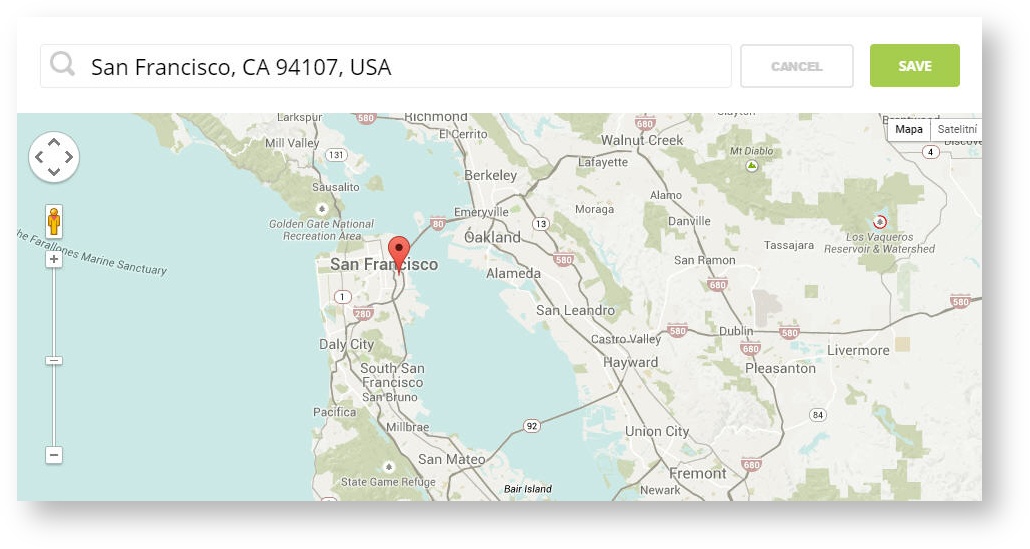
Step 7: In the pop-up window type your location or just move the marker on the map and click on the save button to confirm the selection. This address is used for ad GEO targeting.
Step 7: Click Save

Note: Newly added hotspot are marked as ![]() (Hotspot pending). After the first user connects to the hotspot via SOCIFI, the status will automatically change and appear as
(Hotspot pending). After the first user connects to the hotspot via SOCIFI, the status will automatically change and appear as ![]() (Active) within an hour. Get your first connections to test if it works properly.
(Active) within an hour. Get your first connections to test if it works properly.
