Xirrus
Tested versions:
| Model | Type | Firmware version | Description | Limitations |
|---|---|---|---|---|
XR-620 *Note | AP | AP + controller | no speed control |
Note: AP by Xirrus is a separate modular device containing both the controller and radio control modules.
*Note by vendor:
Version XR-620 has two independent radio modules operating on either 2.4 GHz or 5 GHz switchable in management. The device is fully compatible with SOCIFI. This unit has a throughput of about 867 Mbps and serves 240 users (120 per one radio). On the market there are more powerful units. A DHCP server uses an external DHCP server in the network where it is connected, you can define internal DHCP server. The configuration is then more complex.
MAC address for administration
MAC address, needed for setting in the SOCIFI Dashboard, is available after sign in to the web portal of device management console. In the tab Array / Information MAC addresses are listed next to the names of Ethernet interface, specifically for values Gigabit 1 and Gigabit 2. During the tests it was proofed that both gigabit interfaces are standardly connected to 802.3ad Trank, so that they are presented in the admin system only by the MAC address port Gigabit 1.

Setting SSID, Hotspot, Radius Server and WalledGarden
Setting of these services can be found in the menu SSIDs / SSID Management. Given that the SSID of the network can not be edited later, it is necessary to know the desired name in the beginning. Otherwise, you need to select the entire section again, including the gradual entry WalledGarden domain. Create SSID networks (in the table fill in the name next to the Create button and then click on to create). Then for the selected SSID enter the following parameters:
| Enabled: | ✔ check |
| Brdcst: | ✔ check |
| Band: | select desired band or e.g. Both |
| VLAN ID: | select (none) |
| VLAN ID/Number: | leave empty |
| QoS: | select 0 |
| DHCP Pool: | select (none) |
| DHCP Pool /Opt: | do not check |
| Filter List: | select (none) |
| Encryption/Authentication: | select None/Open |
| Encryption/Authentication/Global: | do not check |
| Xirrus Roaming: | select Off |
| WPR: | ✔ check |
| Fallback: | select None |
| Mobile Device Management: | select None |
In paragraph SSID Limits do not restrict anything, leave everything at the default settings:
| Stations: | set unlimited |
| Overall Trafic (Packet/Sec): | ✔ check Unlimited |
| Overall Trafic (Kbps): | ✔ check Unlimited |
| Trafic per Stations (Packet/Sec): | ✔ check Unlimited |
| Trafic per Stations (Kbps): | ✔ check Unlimited |
| Days Active: | ✔ check all (Everyday, Sun, Mon, Tue, Wed, Thu, Fri, Sat) |
| Time Active: | ✔ check Always |
Paragraph Web Page Redirect Configuration set according to the following options:
| Landing Page URL: | leave empty |
| Background Image: | leave default value, no impact to functionality |
| Logo Image: | leave default value, no impact to functionality |
| Header Text File: | leave default value, no impact to functionality |
| Footer Text file: | leave default value, no impact to functionality |
| Server: | select option External Login |
| Timeout (seconds): | leave default value, no impact to functionality |
| Radius Authentication Type: | leave default value, no impact to functionality |
| HTTPS: | leave default value, no impact to functionality |
| Redirect URL: | set http://connect.socifi.com/ |
| Redirect Secret | leave empty |
It is necessary to enter SSID WalledGarden setting gradually one after another domain including the prefix "*".
Enter following Walled garden ranges:
If you are a customer with the White Label solution, please add your custom domain (for example *.mycustomdomain.com) to the Walled Garden list.
*.socifi.com
*.facebook.com
*.akamaihd.net
*.akamai.net
*.edgecastcdn.net
twitter.com
*.twitter.com
*.twimg.com
*.fastly.net
*.li-cdn.net
*.cloudfront.net
facebook.com
*.fbcdn.net
*.instagram.com
*.cdninstagram.com
instagram.com
*.linkedin.com
*.licdn.com
linkedin.com
facebook.com and twitter.com (Yes, twice. Once with and once without the asterisk)
Pages related to Walled Garden issues
In the following paragraph SSID Authentication Service Configuration set parameters of an external RADIUS server for authentication:
| Authentication Server: | select option External radius |
| Primary Host/IP Address: | enter the appropriate RADIUS server by region |
| Primary Port: | set 1812 |
| Primary Shared Secret: | enter socifi (Case-sensitive) |
| Primary Verify Secret: | enter socifi (Case-sensitive) |
| Secondary Host/IP Address: | enter the appropriate RADIUS server by region |
| Secondary Port: | set 1812 |
| Secondary Shared Secret: | enter socifi (Case-sensitive) |
| Secondary Verify Secret: | enter socifi (Case-sensitive) |
| Timeout (seconds): | set 600 |
| Accounting: | ✔ check |
| Primary Host/IP Address: | enter the appropriate RADIUS server by region |
| Primary Port: | set 1813 |
| Primary Shared Secret: | enter socifi (Case-sensitive) |
| Primary Verify Secret: | enter socifi (Case-sensitive) |
| Secondary Host/IP Address: | enter the appropriate RADIUS server by region |
| Secondary Port: | set 1813 |
| Secondary Shared Secret: | enter socifi (Case-sensitive) |
| Secondary Verify Secret: | enter socifi (Case-sensitive) |
| Interval (seconds): | set 300 |
We recommend to use this set of RADIUS servers:


Next, change the setting of Radius parameters in the menu Security / External Radius and change the following attributes in paragraph Radius Attribute Formatting. Others leave in the default settings.
| Called-Station-Id Attribute Format: | choose Ethernet-MAC |
| Station MAC Format: | select _*UC-hyphenated [XX-XX-XX-XX-XX-XX] |
| Accounting: | enable by ✔ check On |

Wireless Setting
In the menu SSIDs / Active IAPs assign to individual rai wireless modules SSID configuration by checking the appropriate cell in the table.

Finally, still be sure to enable wireless radio modules and in the menu IAPs / IAPs Settings by switching enableat competent modules.
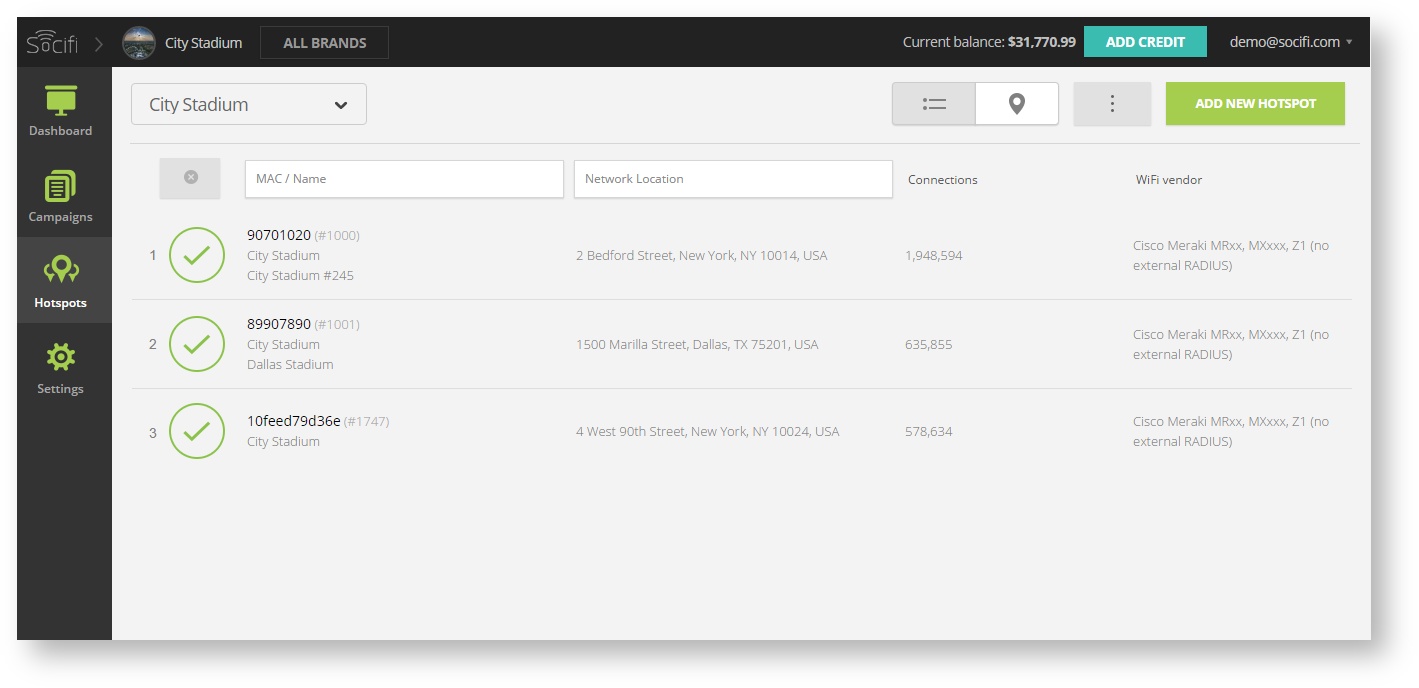
Add a new hotspot to SOCIFI Dashboard
Step 1: Login to SOCIFI Dashboard
Step 2: Click on the "Hotspots" tab on the left sidebar
Step 3: Click on the “Add a new hotspot” button located on the top right corner on the screen (pictured below)
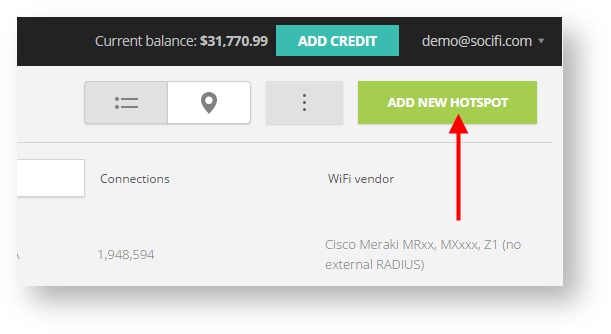
Note: A pop-up window will appear (below)
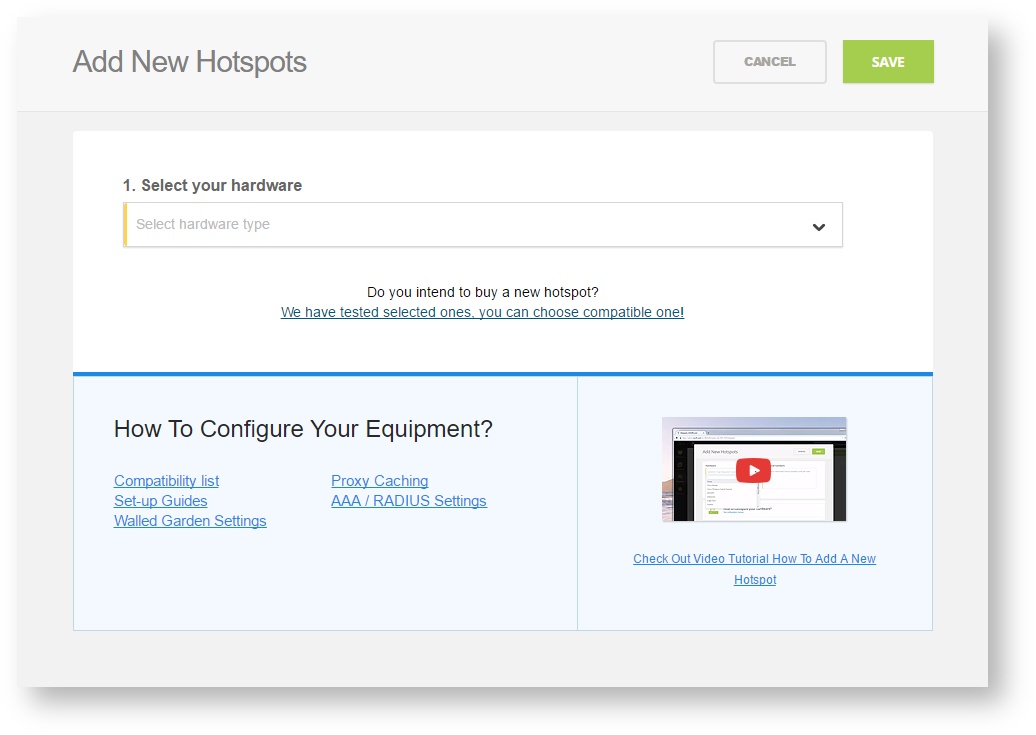
Step 4: Select the Wi-Fi hardware manufacturer from the drop down menu

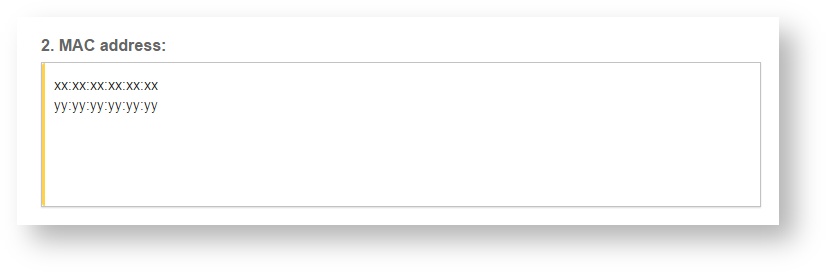
Step 5: Enter the serial number or MAC address (depending on the specific equipment manual) of your equipment. You can add multiple hotspots at once.
Step 6: Set your Network location (this step is essential for correct ad targeting)
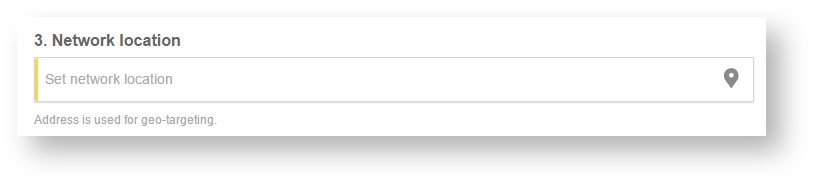
Step 7: In the pop-up window type your location or just move the marker on the map and click on the save button to confirm the selection. This address is used for ad GEO targeting.
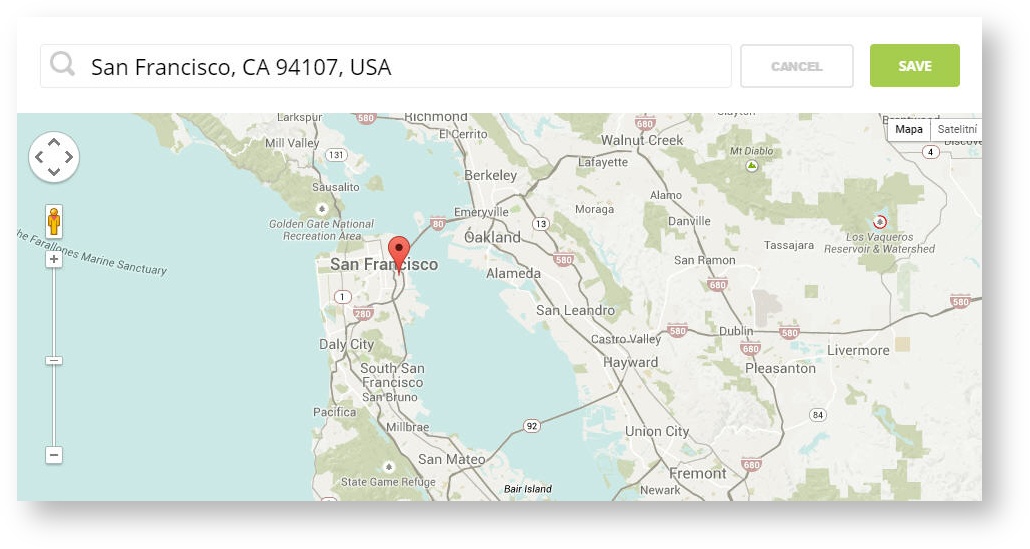
Step 7: Click Save

Note: Newly added hotspot are marked as ![]() (Hotspot pending). After the first user connects to the hotspot via SOCIFI, the status will automatically change and appear as
(Hotspot pending). After the first user connects to the hotspot via SOCIFI, the status will automatically change and appear as ![]() (Active) within an hour. Get your first connections to test if it works properly.
(Active) within an hour. Get your first connections to test if it works properly.
